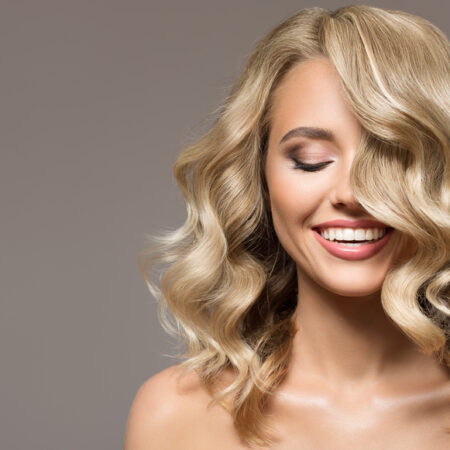
Going from dark hair to blonde is sure to be a dramatic transformation, but it is also one that can be extraordinarily stressful, especially if you are planning to DIY your hair blonde at home. Understanding the exact process for dyeing your darker hair to a light color is incredibly important if you want to prevent hair mishaps and stop yourself from ending up with a color far from the blonde of your dreams.
Before dyeing your dark hair blonde, you should consider what shade of blonde you want to be and how much effort you are willing to put into the style – blonde hair can be a serious commitment, especially if your hair is naturally dark.
To help you out, we’ve compiled a guide that tells you everything you should think about before dyeing your hair and breaks down the steps for you, so you can have the flawless blonde locks of your dreams in no time.
- Things to Consider Before Dyeing Your Hair
- Materials You Will Need to Go From Dark to Blonde
- Step-by-Step Guide for Dyeing Dark Hair Blonde
- Troubleshooting Common Problems
- A Word of Advice Before You Bleach Your Hair
- How Long Will the Blonde Last?
- Can You Dye Your Hair Back Dark?
- Caring for Your Newly Blonde Hair
- A Stress-Free Transformation
Things to Consider Before Dyeing Your Hair
Before you attempt to dye your naturally brunette hair to your favorite shade of blonde, there are a few important things you should think about.
Your Hair Health
The process to transform your hair from darker colored to blonde involves bleaching and toning, in that order. While you may see other methods offered that are “bleach-free,” they are generally not as reliable or as predictable, and many are not feasible to be used on hair that is darker than a very light brown.
This being said, bleaching is a very involved process that has the potential to damage or cause breakage in your hair. If you already have compromised hair, use heat styling tools regularly, or have previously bleached your hair, you should consider using hair nourishing and repairing treatments before embarking on the arduous bleaching journey towards blonde hair in order to prevent serious side effects.
Color Theory and Your Hair
Any time you dye your hair at home, you should review color theory and how it applies to your hair. Color theory is the system that hair stylists use to identify and communicate hair colorings in a general, worldwide language; the system helps stylists find common ground when it comes to creating colors and styles, and is used when instructing new stylists.
Reading up on color theory can help you save your hair from disaster. When you understand the basics, you will be able to roughly identify what hair level you are starting with, how to go about bleaching your hair, and what colors cancel out other pigments, enabling you to make better choices about blonde dyes and toners.
Your Natural Hair Color
As we discussed briefly above, your hair level is important in determining how to go about lightening your hair. There are 10 levels of hair color, and dark hair is typically placed between levels 1 to 6, with level 1 being the darkest black, and level 6 being a light brown. Most of the time, if you are aiming to achieve blonde hair, you are looking to obtain a level 9 or 10 hair color.
When starting out with hair that is dark black or medium brown, keep in mind that you will likely have to bleach it twice in order to get your hair light enough to then tone it blonde. If you are starting out with lighter brown hair, you will probably only need one round of bleaching before your hair is light enough to tone.
If your hair has been dyed a shade of brown or black and you are trying to reach blonde hair, this also needs to be taken into consideration; if the color you started with underneath the dye is already fairly light, you may be able to use a color remover and follow up with a high lift blonde dye instead of bleaching.
However, this method is very situational dependent, and you may want to consider consulting a professional before attempting anything in this scenario.
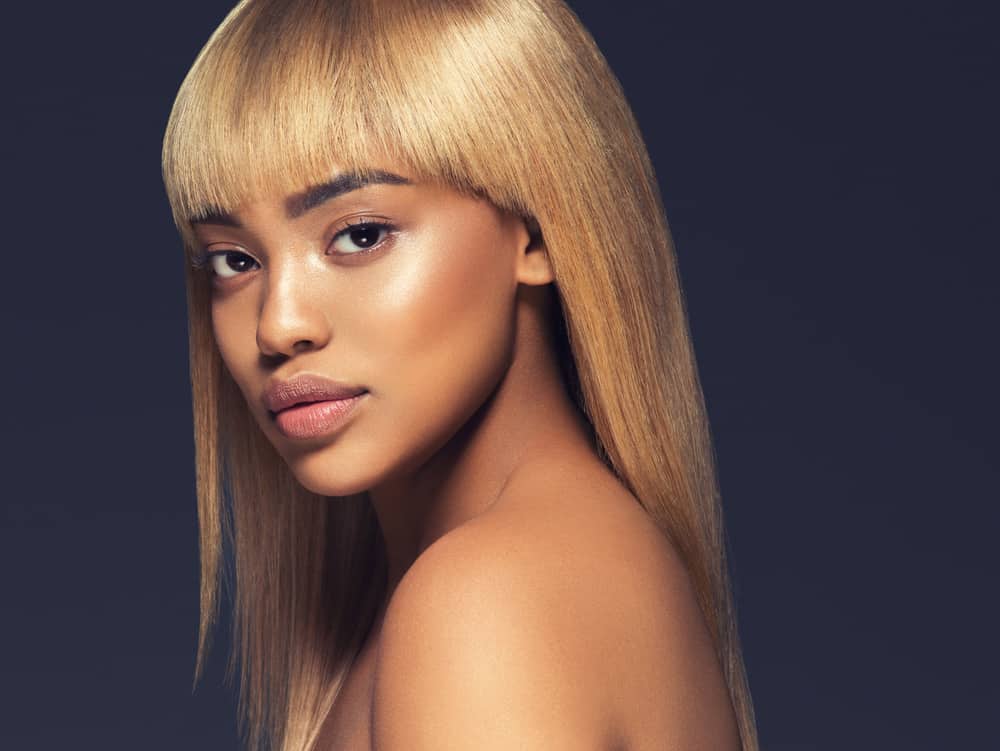
The Shade of Blonde You Desire
Once you’ve established that you definitely want to go blonde, you should start considering the exact shade of blonde you wish to reach. This will help you determine how many bleaching sessions you need and what kind of toner to use.
For example, if you are trying to reach a medium blonde color from a darker brown, you may only need one session of bleaching, followed by a warm, ash-colored toner. On the other hand, if you are trying to reach platinum blonde from a dark brown color, you should be ready to commit yourself to at least two bleaching sessions and a toner that promises an icy color.
Level of Maintenance
Blonde hair can be a commitment, especially if you are starting out with dark hair; your natural hair’s growth will be easily noticed at the roots, so you should choose a style that you have no problem keeping up.
For a whole head of blonde hair, you will likely need to touch up the roots with bleach and toner every 4 to 8 weeks. If this is too much for you, then you may want to consider a blonde style like balayage or ombre. Keep in mind that both of these styles can be harder to recreate at home, so you may want to consult a professional if you are set on obtaining them.
Materials You Will Need to Go From Dark to Blonde
Going from dark to blonde hair is a serious process and requires several different materials to achieve the transformation. You need all of these materials if you are going to bleach your hair at home; missing one of the items could result in an unfortunate hair mishap.
Bleach
The right type of bleach is incredibly important to have, as bleaching is the first step in the process to transform your hair. You should be looking for a professional powder bleach that can offer at least 5 levels of lightening.
For anyone with very dark brown or black hair, you may want to consider a bleach like this one that offers up to 9 levels of lightening and reinforces the bonds of your hair, when used correctly.
Toner
The last step on your journey to blonde hair is to tone what you just lightened with bleach. Selecting a toner that has the proper color and tonality to it is very important if you want your hair to turn out the shade of blonde you were expecting.
When choosing a toner, look for indicators on the box that state whether it is a warm or cool blonde shade. This will let you know whether the color will suit your skin tone.
Additionally, you should look for a professional toner, because you will typically receive more vibrant, lasting results from a professional brand, such as this one.
Developer
Developer is essential in both the bleaching and toning process. You need to choose the right volume of developer to efficiently activate both products, while still not being too strong for your hair to handle.
There are 4 volumes of developer to choose from – 10, 20, 30, and 40.
- 10 volume is the weakest and not recommend for bleaching, as it doesn’t provide much of a lift.
- 20 volume is best for toning, as it only provides 1 to 2 levels of lift.
- 30 volume is recommended for bleaching, as it will give you between 3 and 4 levels of lift.
- 40 volume is the strongest developer available and is typically not recommended for at-home usage because of how harsh it is and how likely you are to damage your hair with it.
Hair Dyeing Equipment
In order to proceed easily through the steps of bleaching and toning your hair, you will need the proper equipment to help you out.
When bleaching your hair, you should be wearing clothes you don’t mind getting stained or a plastic covering over your clothes. You’ll also need:
- hair clips to help with sectioning
- gloves to protect your hands from the chemicals
- a color brush to apply toner and bleach to your hair
- a mixing bowl
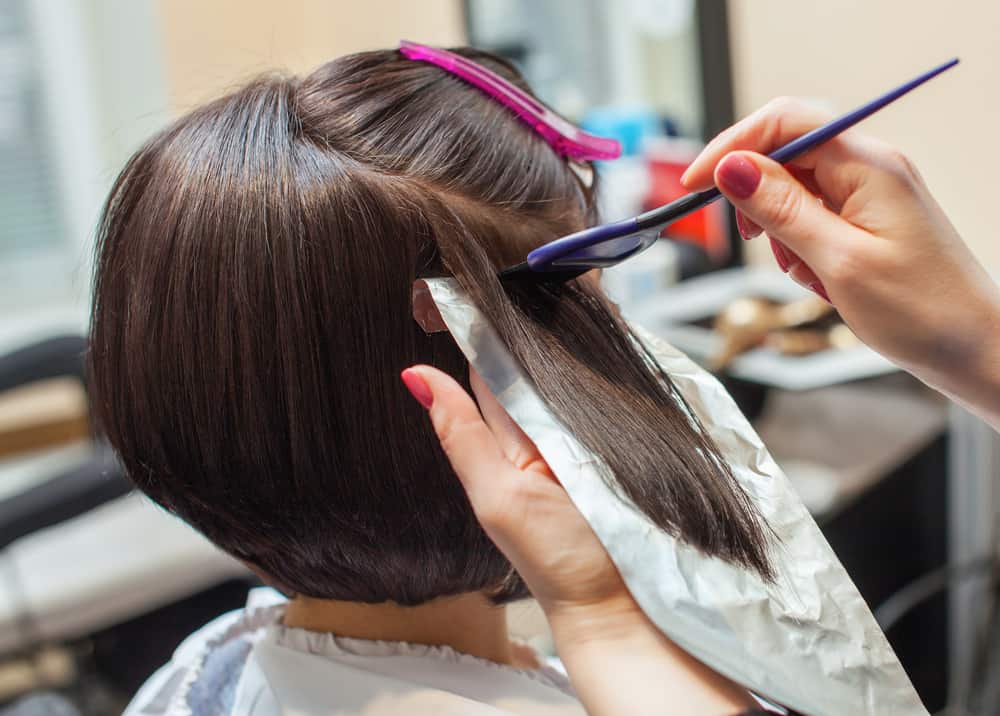
- aluminum foil (Foil is a good idea if you are trying to lighten very dark hair, but it is not necessary.)
If you want, you can purchase all of these items together in a set, or you can purchase them separately.
Step-by-Step Guide for Dyeing Dark Hair Blonde
Once you’ve decided that you definitely want to dye your hair blonde and you’ve picked up all the equipment you need, it’s time to get started!
Below, we have a basic step-by-step guide for dyeing your hair from a natural brown or black to blonde, but you should be sure to read all the directions on your products before applying anything to your hair.
Before Bleaching
Bleaching is the first step in the process of changing your dark hair to blonde. To prepare yourself for bleaching, make sure you have all of your hair dye equipment readily available and all of the products you need. Decide on a day to bleach your hair and give yourself ample time to get the process done; there’s nothing worse than a rushed DIY hair job.
In the couple of weeks leading up to your hair’s bleaching day, you should be using nourishing and hydrating treatments on your hair; you want your locks to be as healthy as possible so they can withstand the bleaching process more easily.
Don’t wash your hair with shampoo or conditioner within 24 hours of bleaching your hair. You want your tresses to maintain some of their natural oils in order to give a little bit of protection for when you apply the bleach.
Bleaching Steps
To properly bleach your hair, follow these steps carefully – again, also checking your products’ directions for any adjustments you should make to this process.
Step 1: Set up in a Safe Area
Set up your bleaching station in an area like a bathroom that is out of the way and easy to clean up. You should cover up everything you don’t want stained, including yourself, with cloth or paper. You can apply a little bit of coconut oil around your ears and hairline to prevent bleach from getting directly onto your skin.
Step 2: Separate Your Hair Into Sections
Separate your hair into at least four sections, two at the front of your hair and two at the back. If your hair is especially thick or coarse, you may need to make more sections than this.
Step 3: Mix Your Bleach and Prepare Your Foil
Mix your bleach in the recommended ratio in your mixing bowl and prepare sections of foil, if you are using it. Foils are a good idea if you have very dark brown or black hair and want to achieve a lot of lift in one bleaching session.
Step 4: Apply the Bleach to Your Hair
Begin working from the bottom back of your hair (this is so you can lay hair strands on top of each other without issues). Take a small chunk of hair out of your first section and apply bleach to it, starting an inch from the root and working your way down. Make sure it is fully saturated so that the bleach looks like toothpaste on top of the hair. Lay the hair down gently and move on to the next piece.
If you are using foils, place the chunk of hair on top of the foil, then apply the bleach and secure the hair fully in the foil before moving on to the next piece.
Continue on like this, moving section to section, bottom to top, until you have covered all of your hair in bleach.
Step 5: Apply the Bleach to Your Roots
You should then move on to bleaching your roots; paint bleach on the roots from the bottom back and work your way up to the top and front, fully saturating your hair. Keep in mind that roots are the fastest to lighten, thanks to heat from the scalp, so you do need to move fairly quickly.
Step 6: Let the Bleach Sit and Check for Progress
After the bleach is completely applied to all areas of your hair, you should sit and wait the recommended time. This time is usually between 15 and 30 minutes, but you may want to check the lightness of your hair every 10 minutes to see the progress. Don’t leave the bleach on for much more than 30 minutes or you risk serious hair damage.
You may choose to place a plastic bag (spritzed on the inside with water) over your hair during the processing time to encourage maximum lightening.
After Bleaching
Once the bleach has been on for the recommended amount of time, you should take off any foils or the plastic bag, if you are using them, and wash the bleach off in cool water. You may be able to use lukewarm water, but don’t use very hot water as this can damage your fragile hair strands.
Flip your hair over, washing out the bottom and back of it first, and make sure to use shampoo and conditioner in order to completely inactivate the bleaching chemicals.
After your hair is washed, comb through your hair while it is wet, towel dry until it is no longer soaking, and allow it to air dry the rest of the way. As soon as it is completely dry, you will be able to see the true color of it and whether or not one more bleach session is needed before toning.
If the color of your hair is still too dark after one bleaching session (and it probably will be an orange color if you started with very dark black or brown hair), you will need to wait several days (up to 2 weeks is preferred) and then bleach it again. Remember that you are trying to get your hair to a level 9 or 10 lightness before toning it.
Toning Steps
As soon as you have determined that your hair is light enough, you can move on to toning your hair. This process is very similar to bleaching in that you should be sectioning your hair and applying the toner from the bottom back to the top front, and leaving your roots for last.
You can apply toner to damp or to dry hair; damp hair will dilute the toner color a little bit, while dry hair will make the toner more vibrant. Make sure to mix your toner with 20 volume developer for best results.
After Toning
Toner can stay on your hair for up to 45 minutes, but most of the time you will only need to leave it on for 15 to 20 minutes.
Once your hair is fully covered in the toner, check the progress every 10 minutes to see if it is at the desired color; it is important to note that you may not always be able to tell what color your hair is under the toner, so if you have concerns, you should just leave it in the recommended 15 minutes.
After the time is up, wash the toner out with cool water. Don’t use shampoo during this time, as that will remove the toner pigments and prevent it from properly coloring your hair. You should wait at least 24 hours after toning to shampoo your hair for maximum blonde results.
Once the toner is washed out, you can air dry your newly blonde hair and style it as you wish!
Troubleshooting Common Problems
These common hair problems can occur as a result of an accident or a missed step in the dyeing process. Read on to find out what these issues are and some potential solutions.
Patchy Bleaching
After you rinse the bleach off the first or second time, you may notice dark spots or spots that did not lighten evenly. This is typically due to you not having an even application of bleach across all hair strands, resulting in you missing pieces.
To fix this issue, you should re-bleach only the parts of your hair that are too dark, lightening them so they match the rest of your hair. Only then should you move on to the next steps in the process.
Hair Didn’t Lighten
Hair that doesn’t lighten properly after having bleach applied likely wasn’t fully saturated with bleach upon application or had existing color in it that prevented proper lightening.
As a remedy, make sure that you have used a color remover on your hair before bleaching if you already had dye in your hair. You should also make sure that each strand of hair you apply bleach to is fully saturated and completely covered; if you have very dark hair, you should try using foils to further encourage lightening.
Toner Won’t Work
If the toner isn’t working on your hair, it is probable that your hair wasn’t light enough before you applied the toner. Remember, your hair needs to be bleached to at least a level 9 in color before you can tone it to your desired shade of blonde.
You may need to apply another round of bleach and then tone again to fix this problem, but if you have already bleached your hair two times, you might want to consider consulting with a professional before another round of bleaching, because it is very common for extreme hair breakage to occur after two bleach sessions.
Not the Right Blonde Color
After you rinse the toner out of your hair, you discover that you didn’t quite get the blonde color you were aiming for.
This can happen when your bleached hair was not light enough to perfectly capture the toner’s color, or you selected a toner that didn’t quite work with your hair to give you the results you need. You may also have left the toner on your hair too long, causing your tresses to pick up the blue, purple, or silver pigments in the toner.
This issue can be a tricky one to fix, because it can be hard to pinpoint the exact cause. Your best bet is to wait for the toner to fade and then try again with another shade of toner. You could also bleach your hair again and then re-tone it, but this is risky as too much bleaching is dangerous for your hair.
A Word of Advice Before You Bleach Your Hair
Bleaching is a difficult process, especially if you are doing it at home by yourself. Make sure you are fully familiar with the steps before beginning. You can watch this video to give you an even better idea of how to bleach your hair.
And remember, if you feel like your hair is becoming too damaged or you feel overwhelmed with the process, you can always stop, wash the chemicals out of your hair, and consult a professional. They will be able to help you fix your hair and won’t pass any judgment on what you did to it at home.
How Long Will the Blonde Last?
Bleach is a permanent process, so once you’ve bleached your hair from a dark color, you can expect it to last like that until your hair grows out and you end up cutting the bleached parts off. Toner, on the other hand, will fade over time, and will only last about 4 to 6 weeks on your hair.
If you want to maintain your exact blonde color, you will need to periodically reapply toner and occasionally rebleach and tone your grown-out roots to upkeep the style.
When Are Touch-ups Necessary?
Touch-ups are a normal part of upkeeping dyed blonde hair, but they are only necessary when you deem them to be. For instance, if you love a completely blonde look, including your roots, you can touch-up the root area with bleach and toner every 4 to 8 weeks, or whenever the root growth is enough to notice.
If you prefer to let your hair grow out naturally and don’t wish to upkeep your blonde color, then root touch-ups involving bleach will never be necessary.
Toner typically needs to be reapplied every 4 to 6 weeks, depending on the blonde shade you are trying to maintain and the brand you use, but again, if you instead want to leave your hair at the shade you ended up with immediately after bleaching, you can skip touch-ups and go au naturel until your original hair color has fully grown in.
Can You Dye Your Hair Back Dark?
Once you see your hair completely blonde, you may end up having a change of heart about the style and end up wondering if you can just dye it back to a darker color. While this is possible, it is not quite as simple as picking up a box of dark hair dye and applying that on top of the blonde.
Hair that has been bleached is completely free of pigments that make up darker hair, including reds, oranges, and darker yellows. This means that simply applying a darker dye over the top would mix badly with the blonde hair, resulting in a murky grey or mud color.
In order to dye your hair back to a darker color, you will first need to use a color filler on your blonde hair to reintroduce some of the pigments it is missing. Once this is done, you can add your favorite dye over the top, though the style will probably work out better if the color you choose is more of a medium-toned dark color.
Caring for Your Newly Blonde Hair
After your hair is dyed blonde, you can incorporate a few of these tips in your daily routine in order to improve the health of your hair and maintain its color.
Tinted Conditioners
Shampoos and conditioners that are infused with purple and blue tones can help you maintain the blonde shade of your hair. These pigments work to combat any sort of darker or brassy pigments in your blonde, keeping the color looking fresh.
You can use both of these to maintain your blonde color in between toner touch-ups, though conditioners may be more beneficial to your bleached hair.
Hair Hydration
Replenishing the moisture in your hair is extremely important after you have put it through so much during the bleaching process. You can do this by applying homemade or store-bought hair masks and deep conditioning treatments to improve hair integrity and softness.
Bond Repairing
Bond repairing treatments work to repair your hair from the inside out. Treatments like Olaplex can improve the look and feel of your hair after bleaching and help nourish it, so your new blonde color is natural-looking and irresistibly smooth.
Lifestyle Changes
After your hair has been bleached, it will be damaged and fairly compromised. You should consider avoiding things like heat styling and constantly pulling your hair back, as these activities will only damage your hair more. These lifestyle changes will can you maintain blonde hair that looks healthy and vibrant.
A Stress-Free Transformation
Transforming your hair from a dark color to a blonde is no small feat. The process is intricate and involves much preplanning, dedication, and patience.
However, once you understand the steps to this process and work through them one by one, you should be able to flawlessly change your dark hair to your favorite blonde shade without too much stress.