If your nails don’t appear as full, smooth, or healthy-looking as you like, or if your natural nails are weak and need a chance to grow, nail overlays may be your ideal solution. If you’re asking, “What is a nail overlay?” read on to discover everything you need to know.
We’ll cover what nail overlays are, what makes them different from nail extensions and other nail options, their history, how to apply them, and everything you need to know to rock smooth, thicker-looking nails with the help of overlays!
What Is a Nail Overlay?
Two kinds of false nails exist – overlays and extensions. Unlike extensions, a nail overlay won’t extend the wearer’s own nail. Rather, it involves a hard-wearing, strong gel or acrylic being directly applied onto the natural nail and then shaped manually. This results in a neat and attractive look before being buffed for an attractive and glossy effect.
What Are the Main Features of Nail Overlays?
A key element of overlays is avoiding adding any additional material to the nail’s free edge. The overlay’s free edge shouldn’t be thick as if lots of material is piled onto the nail’s free edge; they may break. Rather, the free edge must be the nail overlay’s thinnest part unless extra material is being added to counterbalance a thin nail that tends to curl upwards.
Meanwhile, the overlay’s thickest point must be lengthwise, in the center of the nail’s natural bed, since this is the nail’s stress zone which requires reinforcement to guard against breakage. Extra material must be left in this stress zone, so a slight and natural-looking curve is formed that tapers off at the nail’s free edge, close to the cuticle and at the side edges.
What Is the Difference Between Nail Extensions and Overlays?

The primary difference between nail extensions and overlays is that overlays only cover your natural nail. Extensions, meanwhile, will extend over its free edge.
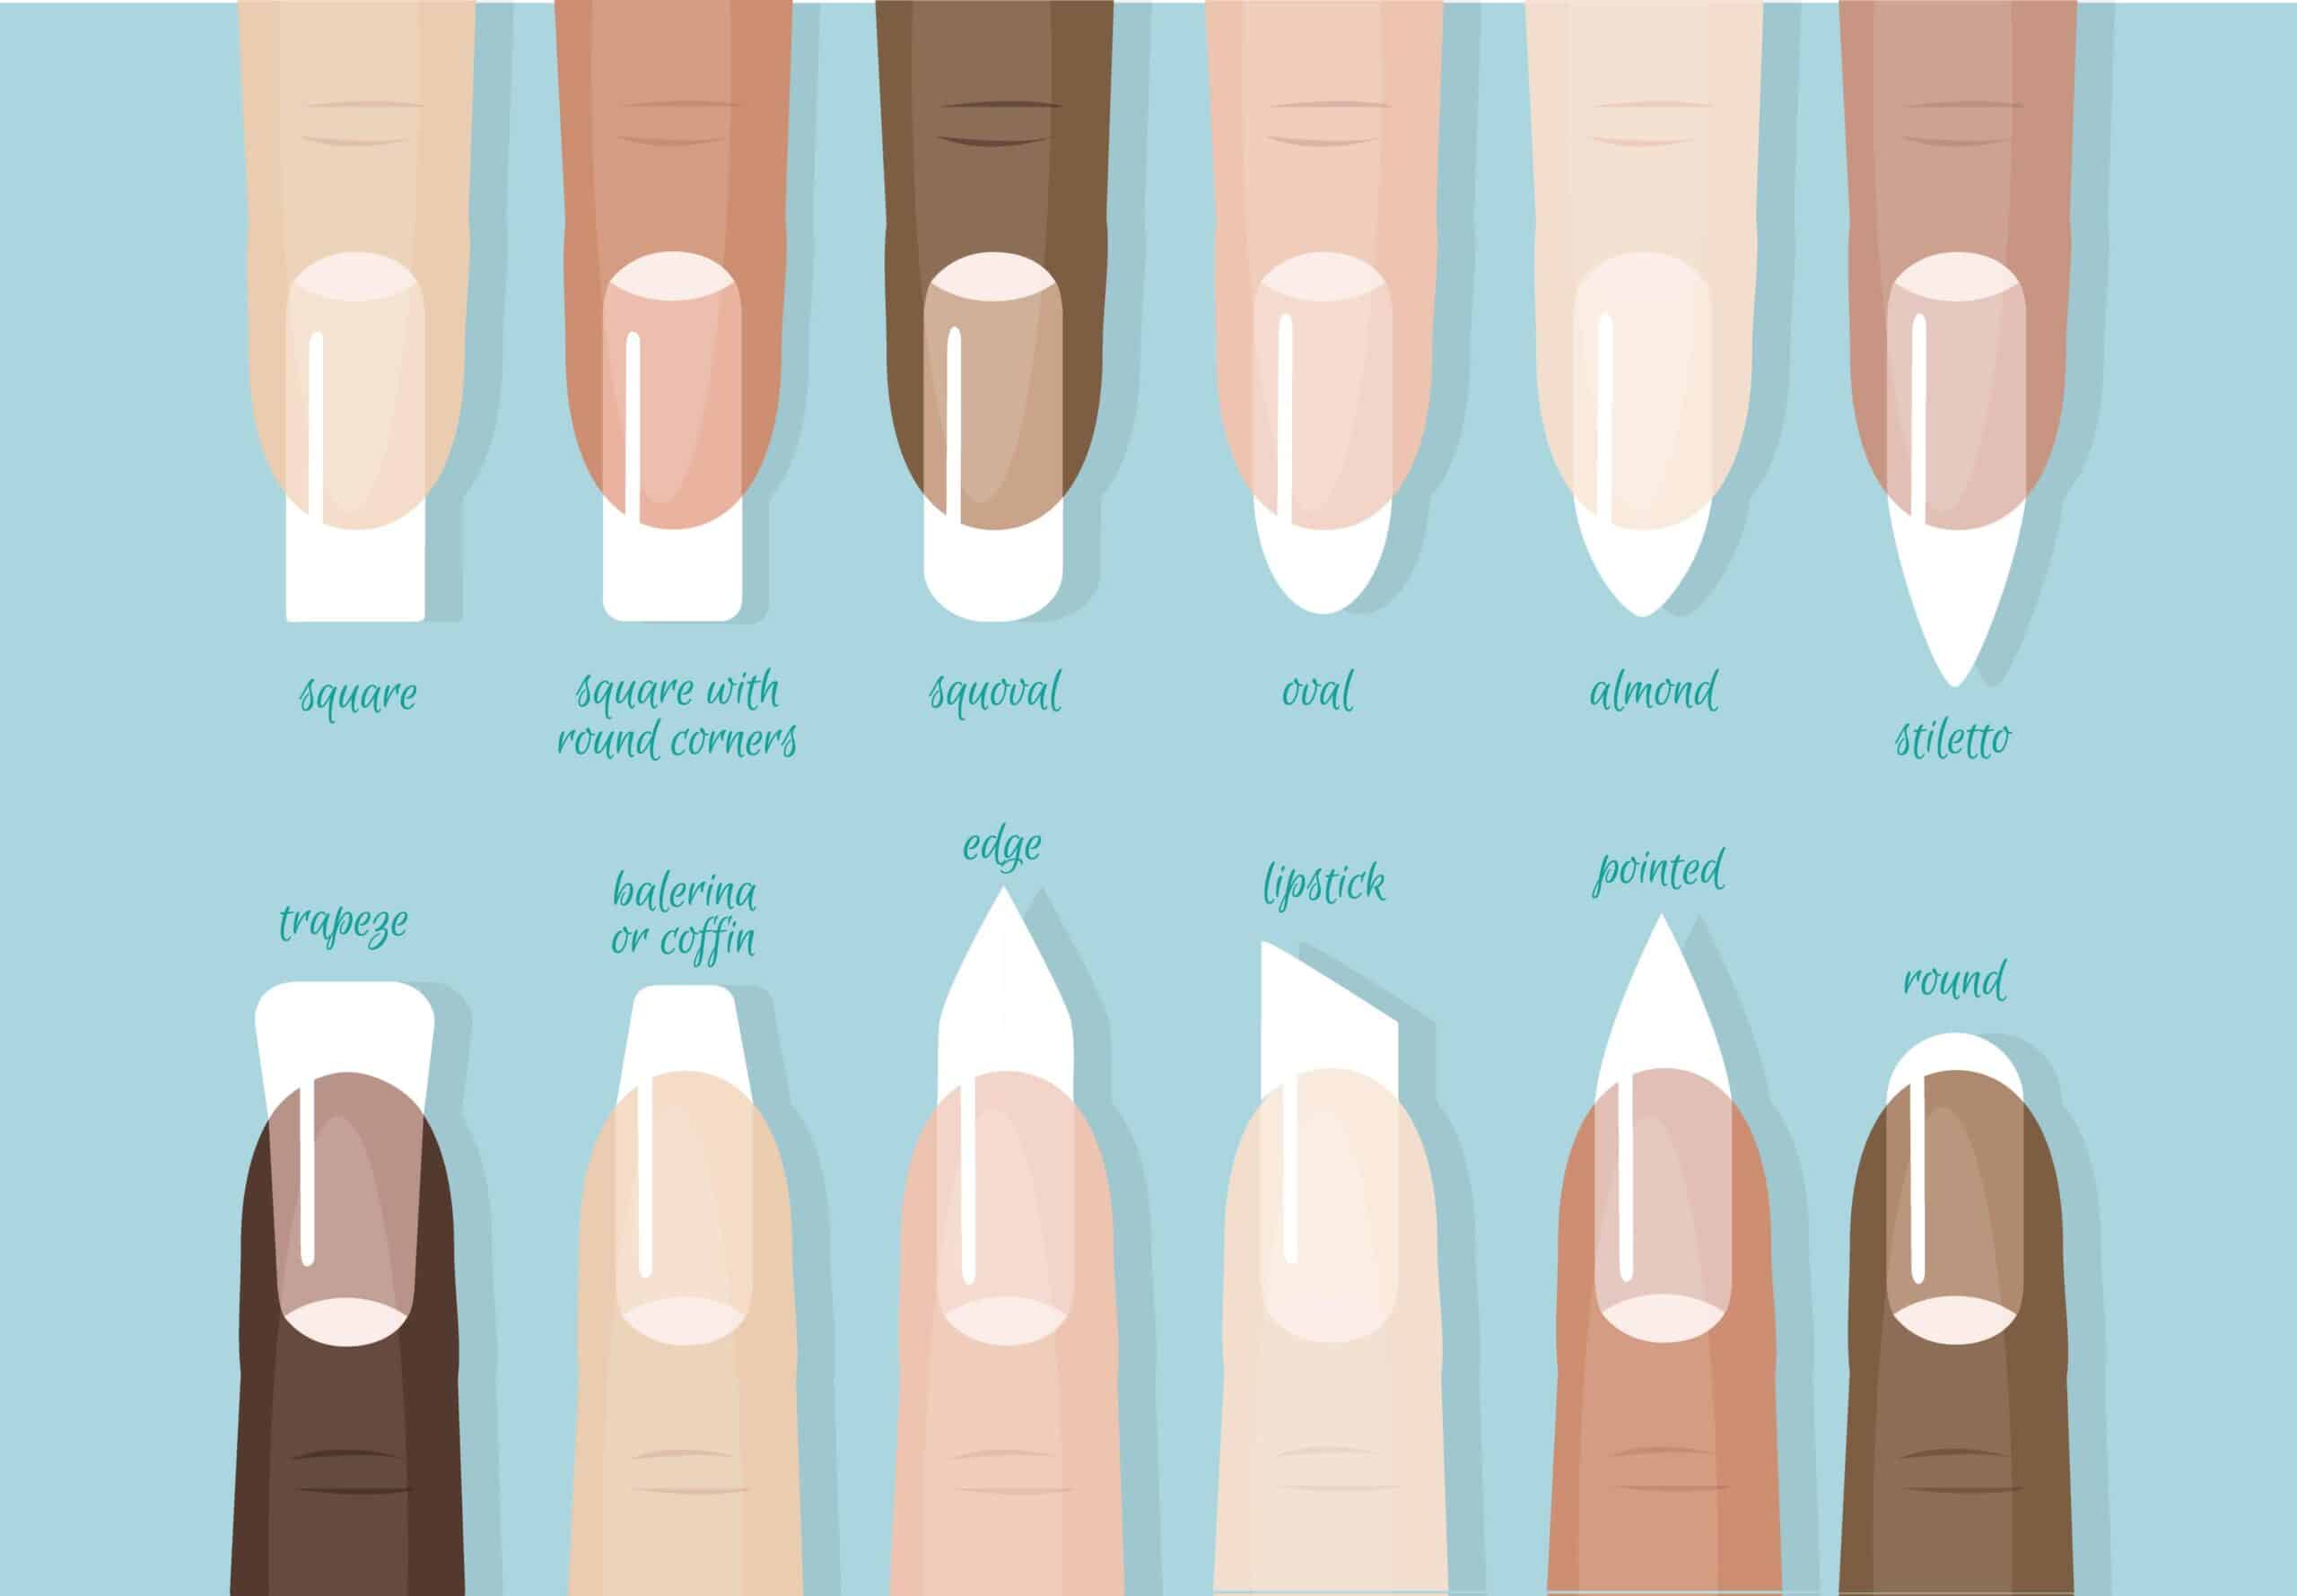
Nail tips, otherwise known as extensions, are made from durable yet lightweight plastic that is trimmed to the wearer’s chosen shape, like coffin or almond. Extensions are glued onto the wearer’s own natural nail and then overlaid with gel or acrylic, so they have a more secure finish.
Extensions have tips which are glued onto the nail or, alternatively, with forms which act as a base for added material. Nail overlays use identical materials to nail extensions; however, the process of application is different. Similar to nail extensions, an overlay is spread over your nail using a sculpting brush with a C-curve being formed for reinforcement.
Is There a Difference Between Infills and Overlays?
Infills involve only filling in the natural nail’s naked parts between a nail extension – or area covered with polish – and the cuticle.
As the nails grow out naturally over time, a gap will appear, and since nails grow fairly rapidly, manicures begin to look strange within just a few weeks with the design getting pushed downwards. This leaves a grown out area of bare nail which needs to be covered up with new extension material then connected seamlessly to old extension material.
Doing infills is cheaper and easier than re-creating nail extensions, and it also allows you to keep your chosen nail design. Lots of people choose to leave their extensions in place for a long period, choosing only to do regular infills instead.
Is There a Difference Between Gel Polish and a Nail Overlay?
While gel polish only provides a colored coating for your nails, nail overlays aren’t just about color. Often, nail overlays are used with gel polish to provide an extra layer beneath the polish to reinforce the nail and smooth the ridges and dents on the nail plate. The result is a perfect matte or glossy gel manicure.
Overlay nails are suitable for use with a variety of nail designs, and nail overlays can be finished with colored acrylic nails rather than gel polish if you prefer.
What Are the Benefits of Overlays?
Overlays are an ideal manicuring solution if you want your nail plate to look smoother. This is because they fill in any dents in your natural nails. They also reinforce and support your nail plate to guard against nail breakage and make your nails appear thicker.
Overlays can also prolong the lifespan of a gel manicure and can help naturally weak and thin nails grow out without getting damaged by supplying a protective coat. Overlays are an ideal reinforcement under gel polish or in place of standard nail polish as an attractive and natural-looking coating for your nails.
If you’d like to only use overlays with no gel polish, you can use a camouflage rubber base coat or polygel in beige, peach or pink either without or with a shimmer to make your nails look elegant and glossy.
Overlays are also an excellent solution for anyone who bites their nails or who struggles to grow them, since they provide additional protection for nails that are prone to breakage and are weak.
When Should I Not Use Overlays?
If you wish to extend the length of your nails beyond your nail plate’s natural free edge, overlays aren’t for you. Also, overlays cannot restore your natural nails, or make them stronger or healthier.
While overlays make nails appear thicker, they cannot make them appear longer. If your natural nails are already thick and strong, nail overlays can make them look too bulky, so in this case, they aren’t for you.
Should I Apply Overlays to My Natural Nails?
Overlays are a great choice if your natural nails are weak, ridged or bumpy, or look too thin. They’re also a brilliant additional layer under gel polish or acrylics.
If you’re looking for a good way to make your nails look attractive, glossy and elegant, overlays could be the perfect addition to your manicure, and if you follow the advice here, you’ll know how to create this look at home.
How Do I Prepare My Nails for Overlays?
Before applying overlays to your nails, appropriate preparation is vital. This will ensure maximum adhesion, so your overlays stay in place longer since optimal preparation guards against lifting.
- First, push back your cuticles using an orangewood stick or pusher, then lightly buff the shine off the nail’s natural plate.
- Using 99% isopropyl alcohol or special nail cleaner, cleanse your nails thoroughly before using a dehydrator so the nail plate is de-oiled and any moisture removed.
- Once this is complete, apply an acid-free or non-acid primer to the whole nail plate or, alternatively, to the sides and tip of your nail without touching your skin. This will act as double-sided tape to bond the nail to the overlay.
How Can I Do My Own Gel Nail Overlays?
There are several items that you’ll need to do gel nail overlays yourself:
- Gel nail files
- An acetone-free nail polish remover
- A buffer
- A primer
- A base gel
- A color gel polish (optional)
- A gel top coat
Once you have the above items to hand, here are some steps to follow to help you achieve beautiful nail overlays at home:
- Clean your nails using the acetone-free polish remover, then buff them lightly so any shine is removed.
- File your nails to your chosen shape.
- Repeat the cleaning process so you have a contaminant-free surface to work on.
- Apply a small amount of primer in a thin layer.
- Allow the primer to completely dry.
- Apply a layer of gel base coat.
- Allow to cure thoroughly.
- Once cured, apply another thin gel base coat layer over your entire nail.
- Add slightly more gel along the nail’s center. Allow it to settle for several seconds before curing it beneath the lamp. This creates a curve with a natural appearance to the surface of the nail.
- File the nail’s surface to suit your preferences. Avoid applying excess pressure – filing down to the natural nail isn’t the look you’re going for!
- Once you’re pleased with the appearance of your nail, buff it.
- Clean the nails once more.
- If you wish to add color gel polish, add it now, curing completely in between coats.
- Apply the gel top coat in a thin layer, covering all free edges before curing.
- Finally, remove any remaining residue, and your nails are good to go!
What Is the History of Nail Overlays and Extensions?
Although nail extensions seem to be quite a modern concept, in fact they’ve been around since the days of the Ancient Egyptians. While originally only the very wealthy were able to afford overlays, these days, they’re accessible to everyone.
In their earliest days, they were made from gold or ivory, but contemporary overlays are made from much less precious and more affordable materials.
Who Invented Nail Overlays?
During the 1950s, a dentist known as Fred Slack broke one of his nails while he was at work. Realizing that a broken nail could be both uncomfortable and unhygienic for his patients, he used dental materials and successfully crafted his own false nail. Some time later, he patented the idea, and the nail overlay was born!
These days, multiple types of nail extension and overlay techniques are available for anybody who wants to improve their own natural nails’ strength and appearance, yet all originated from dentistry!
Enjoy Healthier-Looking Nails With Nail Overlays
Now that you know everything you need to about nail overlays, you can apply and wear them with confidence.
Whether you’re looking for help growing out or quitting biting your nails, or if you just want a quick way to make your nails look smooth, full, and strong, nail overlays may be your new best friend. Give them a try, and rock your new nail look!
