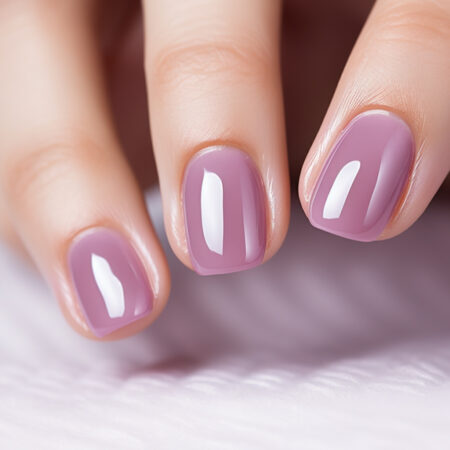
If you want to get the most out of your manicure, gel nail polish is often the way to go. It lasts much longer than a regular nail polish, staying shiny and unchipped for up to three weeks, and no acrylic nails are required. This extra durability is due both to the ingredients in the gel polish and the process of drying each layer underneath a UV light.
However, as anyone who’s had gel nail polish can attest to, the removal process for gel nails can be a hassle. While it might be tempting to start picking at the polish as soon as it (finally) starts chipping, this can be very damaging to your nails.
Gel nail polish is so strong because it is sealed to your nail; picking at it to remove it will often take the top layer of your nail with it, leaving the nail weak and brittle. This takes a long time to heal and can potentially interfere with your ability to get manicures in the future.
Returning to a salon is one safe way to remove your gel nail polish, but the cost can add up, especially if you frequently get manicures. A more efficient option is to remove your gel nail polish at home. When done correctly, you’ll have safe, salon-quality removal results at a much lower cost.
What Do You Need to Remove Your Gel Nail Polish?
Before you get to work removing your gel nail polish, you’ll need to make sure you have all the materials listed in order to make the process as smooth and safe as possible.
Should You Use Store-Bought Removers?
If you look in the nail care aisle of any store, you’re likely to find products advertised as gel polish removers. Most of the time, these will be jars containing acetone-soaked sponges. Unfortunately, while they’re incredibly convenient, most of these products are very ineffective. It’s often a better, and cheaper, option to opt for the following, more direct, at-home removal method.
Should You Use Pure Acetone or Nail Polish Remover?
It is important that you are using pure acetone instead of regular nail polish remover during this process. Acetone is more powerful when it comes to removing gel polish, but it does have the tendency to dry out the skin and nails with repeated use.
Regular nail polish remover is a mix of acetone, water, and other types of solvents, and was designed for use with acrylic nail extensions due to acetone often causing extensions to lift off of the nail. If you try to remove your gel polish with regular polish remover instead of pure acetone, it will be a much lengthier process, with the chance that the gel polish will not be fully removed. There is also acetone-free nail polish remover, which is even less effective at removing gel nail polish.
Always use acetone in a well-ventilated area to avoid breathing in excessive fumes from it.
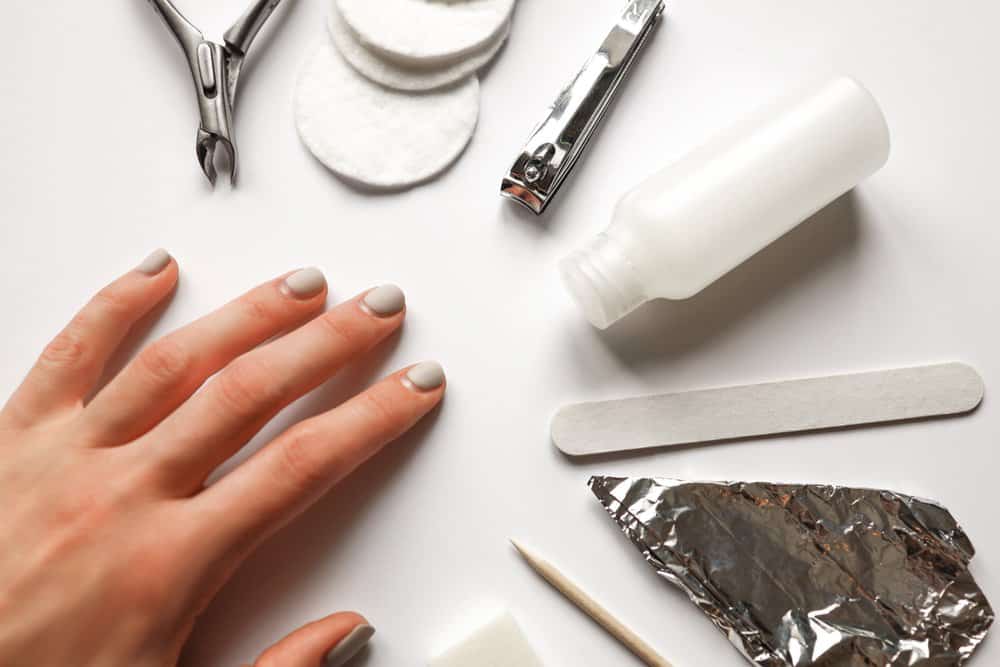
Additional Materials Needed
Besides pure acetone, you’ll need a handful of simple materials to safely remove gel nail polish at home.
- Nail File: A simple, coarse nail file will be the most helpful for removal.
- Aluminum Foil
- Manicure Sticks: These are also called orangewood sticks or wooden cuticle pushers. Any variation will work.
- Cotton Balls
- 100% Pure Acetone
- Small Bowl
Steps for At-Home Gel Polish Removal
Now that you’ve gathered these materials, follow these steps to remove your gel nail polish from the comfort of your home.
File Your Nails
The first thing you want to do is break the protective top coat of your nails. Start by filing the edges and then use the coarse side of the file on the top coat of your nails. This layer is what sealed the gel polish and allowed it to be so long-lasting. By filing it down, you are making it easier for the acetone to soak into the polish and remove it. Be careful not to file too far into the color; your goal in filing is to remove just the layer of shine on top of your nails.
Protect Your Skin
After you have filed your nails, apply a small amount of cuticle oil, or a thick cream such as Vaseline, to your nail beds and the skin around your nails. This will help protect your skin from the strong drying properties of the acetone.
Soak Your Nails
There are two methods you can use to soak your nails:
- The first way is to pour acetone into a small bowl. In the bowl, soak 10 cotton balls. Take each one out and carefully apply it to your nail, wrapping with foil to keep it in place.
This method can become a little complicated when you get to wrapping the last few nails, but it is better for protecting your skin from too much acetone exposure, as the foil keeps the acetone-soaked cotton balls concentrated on the nail.
- The second way to soak your nails is to use a double-boiler type method. Fill a large bowl with hot water and place a small bowl full of acetone in it. Wait a couple of minutes for the acetone to warm up and then dunk your nails in it to soak.
While this method may be easier than taking the time to wrap each of your nails in foil, your fingers have more direct skin exposure to the acetone, which can potentially be very drying.
Wait
Once your nails are soaking, the next step is to wait as the acetone takes effect. This can take anywhere between five and fifteen minutes.
To see if your nails are ready for the next step, look at the edges of the nail polish (or peek under the foil if you are using that method). The corners of the polish should be curling or appear to be lifting off of your nail.
If you don’t see this happening, soak your nails again in five-minute increments until you do.
Use Heat
You can also choose to apply heat while you wait for your nails to soak. When using the cotton ball method, this is done by resting your foil-wrapped nails onto a heating pad during the soaking time.
If you are soaking directly in the acetone, place a small towel over your hand to keep the heat from the hot water trapped around your fingers.
Adding heat to the soaking process can potentially speed up the time it takes for the acetone to work.
Gently Remove the Polish
When the acetone has worked its magic on the gel polish, it’s time to break out your manicure stick. Use the pointed end to gently scrape under the lifted edge of the polish and push back gently.
The polish should be completely soft and easily slide off your nail. Do not attempt to remove the polish if there is any resistance. If you encounter hard patches, lightly refile that area and soak the nail for another five minutes before trying again.
After use, be sure to dispose of the manicure stick. Wooden instruments have the potential to harbor a large number of bacteria and are not something you want to hold on to for reuse.
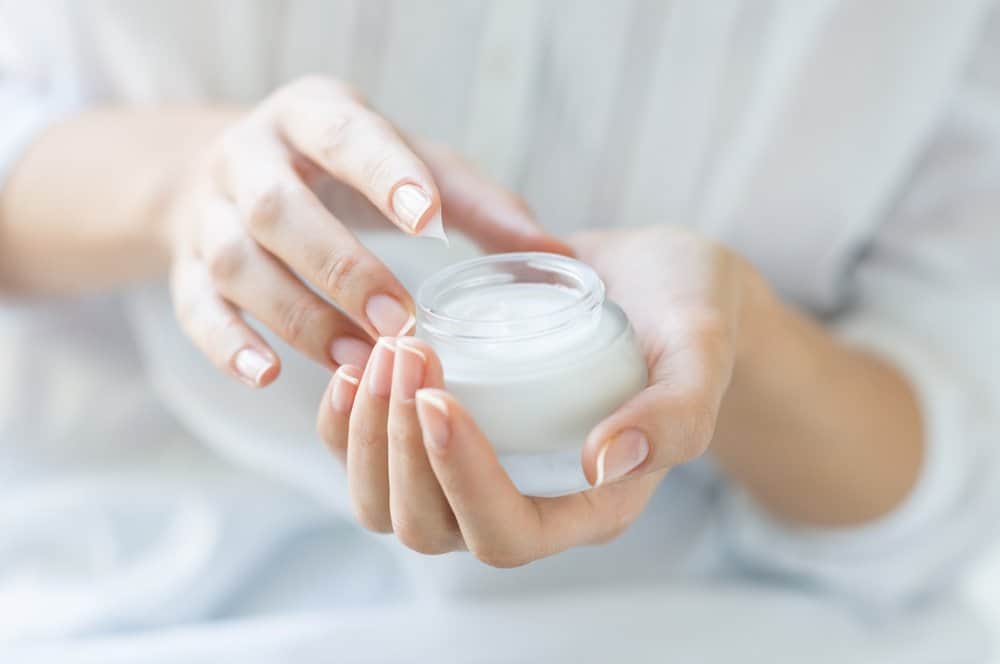
Moisturize Your Nails
As soon as the polish is completely removed, gently buffer your nails to smooth them out. To finish the removal process, apply a cuticle oil to your nails to combat the drying properties of the acetone. To further rehydrate your skin and nails, you can soak your fingers in a small bowl of coconut oil for five to ten minutes or use a hand cream (one containing vitamin E is the best) after the gel polish is removed.
The only reason to not do this after gel removal is if you are applying polish again immediately. However, most experts advise that you should at least wait two to three weeks before reapplying gel polish to allow your nails time to breathe.
Final Nail Care Tips
As with anything, moderation is the key. If you frequently get gel manicures, try giving yourself a break between each one to allow your nails time to repair and maintain their strength.
Both gel nail polish application and removal can be very drying to your nails, so make sure to keep your nails and hands moisturized between manicures with hand cream and cuticle oil. Additionally, it is also a good idea to apply a broad-spectrum sunscreen before your gel manicure to help prevent any negative effects of the UV light used.
Gel nail polish is a fantastic option for when you want your manicure to be long-lasting without the daunting process of applying acrylic nails. If you don’t want to return to the salon to get your gel polish removed, or are just looking for a more economical removal option, an at-home DIY removal is the perfect method to remove your polish safely and without damaging your nails.