Editor’s Note: The urge to drastically change up our hair has hit many of us, and I find that sometimes you just need to change up your style to gain a fresh new outlook and a boost of confidence. Bleaching your hair is one of the many ways that you might achieve a new look, but you should treat this method with caution – hair bleaching can be intensive and might damage your hair if done incorrectly. In my experience, learning everything you can about the bleaching process and DIY hair bleaching helps to make this easier. Double-check instructions, purchase the best bleach for your hair type, and stay on the conservative side to ensure things come out great and you aren’t left with a hair disaster. Check out our guide to the hair bleaching process underneath our top product selections for a comprehensive set of information to help you get that fresh new look without stress!
Hair bleaching has had quite a journey, developing with humans through the ages. Since ancient times people have bleached their hair, but we have moved on from using lemon and sunlight to the fantastic products we have available today. Modern formulations result in less damage, leaving your hair beautiful and healthy.
Regardless of the times, we still go through cycles of wanting to drastically change our hair. From haircuts to dying, sometimes you just want to do something bold and out of the ordinary. But bleaching your hair may not be the best option if you’re having a crisis and you want instant results.
- How To Choose The Perfect Hair Bleach
- Disclaimer
- Top 10 Best Hair Bleaches 2026
- 1. Best Overall Hair Bleach Manic Panic Flash Lightning Hair Bleach Kit
- 2. Best Premium Hair Bleach Schwarzkopf BlondMe Bond Enforcing Premium Lightener
- 3. Best Hair Bleach for Blondes Wella Blondor Multi Blonde Powder Lightener
- 4. L'Oreal Quick Blue Powder Bleach
- 5. Best Nourishing Hair Bleach Schwarzkopf Professional Igora Vario Blond Plus
- 6. Best Hair Bleach for Dark Hair Clairol Bw2 Powder Lightener
- 7. Best Budget Hair Bleach Manic Panic Flash Lightning Hair Bleach Kit
- 8. Best Cream Hair Bleach Wella Blondor Soft Blonde Cream Lightener
- 9. Best Body Hair Bleach Sally Hansen Creme Bleach Extra Strength Face & Body
- 10. Best Cruelty-Free Hair Bleach Jolen Creme Bleach
- The Ultimate Guide to the Best Hair Bleach
- Wrapping Up
How To Choose The Perfect Hair Bleach
Hair bleaching is one of those treatments for which we highly recommend you go to a salon if you want a professional result. Think a DIY Brazilian wax at home – no thanks! We understand, though, that you may want to learn how to do it yourself and skip the trip to the salon.
With that disclaimer out of the way, this guide will get you started on the journey to learn how to bleach your hair safely and successfully every time. To get good you need practice and experience, and if you’re ready to experiment on your own head, it’s time to get started.
Hair Type
First and foremost you need to assess your hair and be honest with yourself. The main things to determine are:
- How dark is your hair?
- Is your hair processed (dyed, permed, etc.)?
- What’s the health of your scalp and hair in general?
Check out our hair guide below to get a full assessment, but the main points are:
- The darker the hair, the more sessions you will need to get it very light blonde
- Processed hair is already damaged and more porous, meaning that the bleaching needs to be more gentle compared to bleaching virgin hair
- If you’ve dyed your hair black before with a box dye, go to the salon or proceed with extreme caution to not melt your hair
- If you have scalp dryness or issues, don’t apply the bleach to the scalp
- Make sure to do a strand test
Levels of Lift
What does it mean when a package says that the bleach has a “lift of up to 7 levels”? Considering the levels of hair, it’s the potential maximum change your hair will undergo if the stars align and you get the perfect result. For example, a lift level of up to 7 will mean that in one session your hair can go from a level 2 to a level 9.
Promise vs Reality
However, the reality is that your hair most likely won’t lift as much as the manufacturer claims. Everyone’s hair is different, both in pigment composition as well as the treatment and health of our hair. This is important, as these factors are what determines how well your hair will lift, and therefore lighten.
Potential Damage
Bleaches claiming a higher lift level are stronger, and therefore may be more damaging to the hair as they will aggressively get the pigment out. You should consider how light you want to go and pick an appropriate strength of bleach and developer, as well as follow an appropriate bleaching technique. If you want to go from level 5 to level 7, for example, there’s no need to go for a 40 volume developer, as this will only fry your hair. Some products such as BlondMe powder offset the damage by packing their products with restoring ingredients.
Equipment Needed
As you need to prepare the hair, bleach it, and treat it afterward, you need the right tools. As a minimum for the bleaching process, you will need a hair bleach, developer, gloves, mixing bowl, and an applicator brush. Oh, and you will need a comb or brush to prepare your hair. Some kits such as Manic Panic come with everything you need to bleach your hair, while others will require all the tools to be bought separately.
The use of foils isn’t necessary, and you can achieve great results without them. They’re generally used to separate the strands, for example when doing highlights, to prevent the bleach from getting on the rest of the hair.
A plastic cap (or a plastic bag) can be very useful to incubate the hair and make the process more efficient. You may also require a measuring jug to ensure the correct ratio of the bleach powder and developer.
Make sure all your equipment isn’t metal (such as iron or copper) as it will corrode when in contact with the bleach.
Disclaimer
Bleaching is not a simple, carefree process, and should be done by a professional. But if you want to press on regardless, we have included a mini crash course in hair bleaching.
A professional has the experience to accurately assess your hair and formulate the best course of action to get the right shade of blonde for you. The process can also be quite time consuming if you want to keep your hair healthy and beautiful – going from level 1 or 2 hair to platinum blonde could take up to a year – so be patient, and avoid going too strong too fast as this will just melt your hair off.
Top 10 Best Hair Bleaches 2026
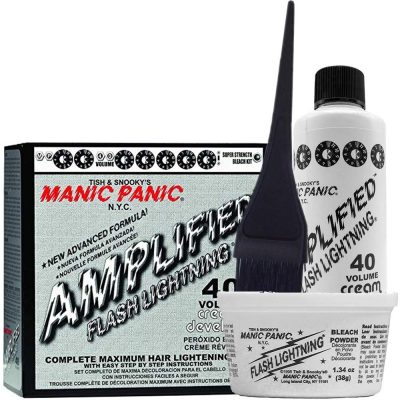
1. Best Overall Hair Bleach Manic Panic Flash Lightning Hair Bleach Kit
Editor’s Rating:
Level of lift: Up to 5 levels
Amount you get: Bleach powder – 1.34 oz., developer – 4 fl. oz.
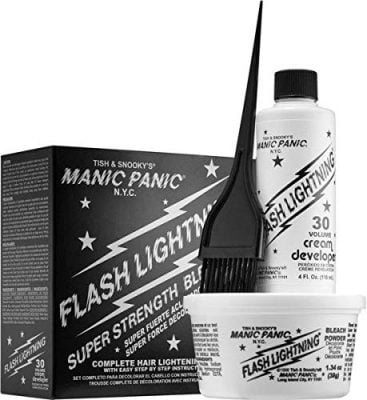
The Manic Panic bleach kit is the most popular option among at-home-bleachers, and for a good reason. The company has been creating cruelty-free, vegan products since the late 70s. When they first opened their punky NYC boutique and changed cosmetic history forever.
Strength
This is a medium-strength bleach which will lighten even dark brown hair when mixed with the provided 30 volume developer. However, don’t expect to be a platinum blonde in one session unless your hair color is already quite light.
If you have naturally black hair, the manufacturer does recommend going for the 40 volume kit to provide a better lift for the stubborn dark pigment.
Features
Not only is it vegan, but also the formula is PPD, ammonia, and paraben free, creating a healthier and more pleasant experience. The included instructions are clear to follow even if you’re bleaching your hair for the first time.
What’s included in the kit
The Manic Panic pack contains everything you need to bleach your hair: dust-free powder bleach, developer, brush, mixing bowl, cap, and gloves.
The amount you get is great for bleaching strands or shorter hair, but if you have thick long hair you will most likely need more than one kit.
Pros
- Cruelty-free
- Vegan formula
- Pack contains everything you need for the bleaching process
- Perfect for strand bleaching
Cons
- Not suitable for black hair
- More than one kit required for long hair
Editor’s Rating:
Level of lift: Up to 9 levels
Amount you get: 15.8 oz.
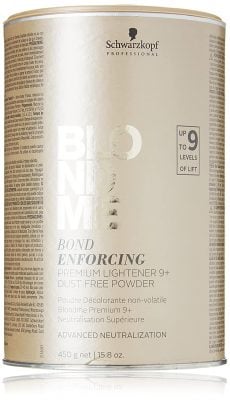
What makes this product premium isn’t necessarily the price, but the amazing formulation. The BlondMe range from Schwarzkopf is developed around the newest advanced bonding system, that ensures healthy hair despite the damaging bleaching process. For the best results, get the matching developer. This definitely bumps up the cost to a premium level, but it’s worth the price.
Strength
The first ingredient is sodium silicate, which is used to control the pH and stabilize hydrogen peroxide, hence enhancing the bleaching process and making it more efficient. The persulfate compounds are further down the list compared to, for example BW2, reducing potential irritation. As the BlondMe formulation strikes a balance between the oxidizing ingredients and the care ingredients, you can expect a high color lift without the associated damage.
Features
While bleach is bleach, and does what bleach does best (damaging hair while lightening it), what makes this formula great are the extra ingredients, not found in other products, that support the health of the hair during the bleaching process.
The inclusion of succinic acid is at the heart of the advanced bonding system. The acid is a patented ingredient that forms bridges in the hair structure, resulting in healthier, less damaged hair. This is very important, as cysteine bridges are broken during the oxidation, resulting in weakened and brittle hair.
The care ingredients such as mineral oil, lysine, arginine, and acrylates copolymer are included in the formula to further protect and restore the hair structure during the extremely damaging oxidation. This results in the hair feeling smooth, healthy, and beautiful after the harsh treatment, significantly reducing hair loss and hair breakage.
One of the ingredients is ultramarine blue color to reduce the brassiness before you even get to the toning stage. Fragrance is also added to create a more pleasant smell during the bleaching process.
What’s included in the kit
Only the bleach powder is included, with the developer being sold separately. It’s recommended to get 30 volume developer or lower for best results. The powder does have a flexible mixing ratio, so you don’t need to panic about slight differences when mixing with the developer, allowing you to make the consistency you want.
Pros
- Advanced bonding system to minimize breakage
- Care ingredients for healthy hair
- Great lift even for dark hair
Cons
- More expensive if you decide to get the developer as well
3. Best Hair Bleach for Blondes Wella Blondor Multi Blonde Powder Lightener
Editor’s Rating:
Level of lift: Up to 7 levels
Amount you get: 28.2 oz.
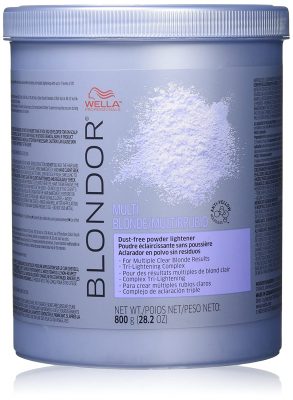
In direct competition to Schwarzkopf BlondMe for the healthiest bleach for your hair, Wella Blondor is almost just as good. While there are no patented ingredients in this formula, nor does it boast a new technology, many still swear by this product as being the best and most effective for bleaching their hair. Despite lack of innovation, Wella Blondor still has a premium price tag, similar to Schwarzkopf Blondme bleach.
Strength
Claiming to lift up to 7 levels, while lower than Blondme, it means it’s also more gentle on the hair. The lower strength offsets the damage and the lack of nourishing ingredients, and is therefore a great choice if you’re already blonde wanting to lighten your hair further.
For people trying to go from level 1 to level 10, this formula may not be strong enough and may require more bleaching sessions to get the platinum blonde you desire.
Features
Wella is providing a more caring formula compared to many other bleach powders on the market, even if it’s not the most advanced formulation. While succinic acid is patented, Wella contains mineral oil, and in particular Oryza sativa (rice) starch, which acts as a conditioning agent that helps in protecting and caring for the hair during bleaching.
Algin may seem like a healthy addition to the formula, however, its main job is to act as a texture improver for the emulsion to help the mixture mix well and glide on the hair. It’s also a humectant keeping the bleach moist as it’s developing, similar to sorbitol in Clairol BW2.
The formula also contains ultramarine color compounds to minimize the brassy and yellow tones in the hair, marketed as ‘anti-yellowing compounds.’ This allows you to potentially skip the toner, particularly if you’re going to be dying your hair afterward.
What’s included in the kit
You get the dust-free bleach powder supplied in a tub, and you will need to get the developer separately along with the required tools. While you can use any developer with the bleach, the manufacturer does advise using the Koleston developer for best results.
Pros
- Gentle yet very effective formula
- Includes anti-yellow compounds
- Contains conditioning agents
Cons
- Can require more bleaching sessions due to weaker strength
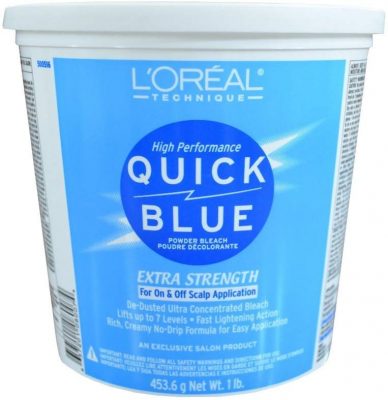
4. L'Oreal Quick Blue Powder Bleach
Editor’s Rating:
Level of lift: Up to 7 levels
Amount you get: 16 oz.
L’Oreal is the pioneer in hair highlighting, with the founder of the company discovering that hydrogen peroxide is a safe way to lighten your hair. The L’Oreal Quick Blue is a great bleach in its own right, even though it doesn’t compete on the same level as the Blondme and Blondor ranges. It doesn’t contain any nourishing ingredients, yet it still does leave your hair feeling soft.
Strength
This is a medium-strength bleach, lifting up to 7 levels in one session. The weaker strength, as compared to BlondMe or BW2, means less damage to the hair, which is important considering the lack of care ingredients. Overall this is a formula that will lighten your hair while minimizing the damage, and doing it for less cash than some of the competitors.
Features
The bleach powder is de-dusted and contains ingredients that provide a non-drip cream when mixed with a developer. The kaolin in the formula keeps the moisture to prevent the cream from drying out as you work.
Urea is included to soften the keratin in the hair, hence preventing the hair from feeling brittle and damaged. This bleach isn’t called Quick Blue for no reason – it contains ultramarine color compounds to neutralize the warm brassy tones in the hair.
What’s included in the kit
Only the powder is included, meaning you need to get the appropriate developer yourself. The recommended developer strength would be 20 or 30 volume such as L’Oreal Oreor.
Pros
- Urea to soften the hair
- Contains ultramarines to neutralize yellow tones
- Gentle yet effective formula
Cons
- Not as nourishing as some alternatives
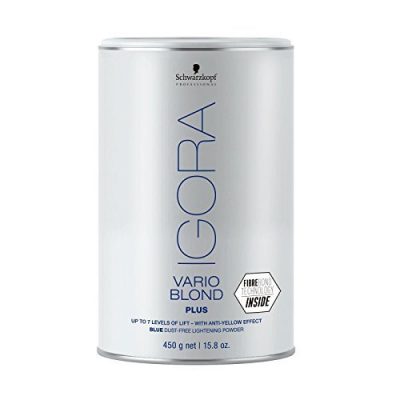
5. Best Nourishing Hair Bleach Schwarzkopf Professional Igora Vario Blond Plus
Editor’s Rating:
Level of lift: Up to 7 levels
Amount you get: 15.9 oz.
If you’re trying to lighten your hair, but not necessarily go from black to platinum blonde, this is a good alternative to the BlondMe bleach. As this product is also from Schwarzkopf, it includes care ingredients and fiber bond technology to minimize the damage and give you beautiful healthy blond hair.
Strength
At up to 7 levels of lift, this bleach isn’t as strong as the Blondme bleach which claims up to 9 levels of lift, meaning it’s perfect if you want to lighten your hair without wanting to go very pale blond. Not only is it weaker, hence reducing the oxidative damage, but it’s still packed with care ingredients that will ensure your hair feels soft, smooth, and deliciously healthy.
Features
As is standard for Schwarzkopf bleach products, the Igora bleach has integrated fiber bond technology to minimize the damage, by forming a protective layer around hair bonds.
The patented succinic acid is one of the ingredients, which forms new bonds resulting in strengthening of the hair strands. The bleach also contains mineral oil, lysine, and arginine which nourish the hair, while the ultramarine blue neutralizes yellow tones.
What’s included in the kit
You get almost 16 oz. of dust-free bleach powder. While you can use any developer with this powder, Schwarzkopf recommends Igora Royal 30 volume developer.
Pros
- Uses fiber bond technology
- Contains nourishing ingredients
- Includes ultramarine blue to prevent brassy tones
Cons
- A bit pricey
- Not as effective as the BlondMe bleach
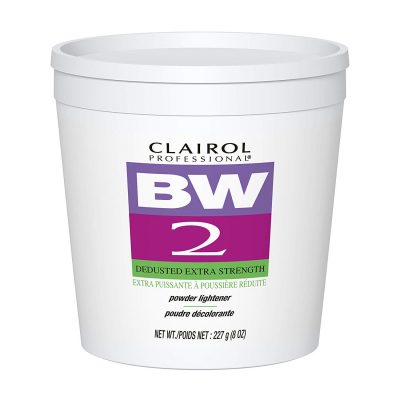
6. Best Hair Bleach for Dark Hair Clairol Bw2 Powder Lightener
Editor’s Rating:
Level of lift: No information available
Amount you get: 8 oz.
From Clairol’s bleaching range, the BW2 is the strongest of them all. It’s very popular among women with black hair, where milder bleaches won’t do the job nearly as well.
Strength
While Clairol doesn’t make any claims regarding the lift level, you can rest assured that this is the strongest stuff you can get your hands on. Due to its strength, the product is recommended for off scalp applications using a 10 or 20 volume developer. If, however, you do have luscious, healthy, resistant hair, you may need to use a 30 or 40 volume developer.
Features
The bleach is de-dusted to minimize the risk of inhalation of the powder, which would be extremely irritating to the respiratory system. The formula also contains sorbitol, which acts as a humectant, meaning it attracts moisture. This significantly increases the drying time, keeping the strands moist, and therefore developing, throughout the process.
Specifically formulated with strength in mind, this bleach doesn’t contain any blue or violet pigments that would neutralize the yellow undertones. Because of this it’s highly advised to get a toner to achieve a good result.
What’s included in the kit
You get an 8 oz. tub of the bleach powder, meaning you will need to obtain your own mixing bowl, gloves, and developer.
Pros
- Great for dark, resistant hair
- Contains a humectant to prevent the bleach from drying up
- No-fuss strong formula
Cons
- Too harsh for delicate hair
- No blue pigments to tone down the brassiness
7. Best Budget Hair Bleach Manic Panic Flash Lightning Hair Bleach Kit
Editor’s Rating:
Level of lift: Up to 7 levels
Amount you get: Bleach powder – 1.34 oz., developer – 4 fl oz.
If you require more bleaching power than the Manic Panic 30 volume kit, then this is for you. The formula is vegan and cruelty-free, while providing more lift and bleaching your hair much faster.
Strength
While this is great for dark, resistant hair, and off scalp bleaching, the 40 volume developer is way too strong for lighter hair (level 3 or higher). This extra strength has a much greater chance to damage your hair and leave it brittle.
This can be an issue for some, as unlike Clairol BW2 where the bleach itself is strong, allowing the color molecules to be removed more effectively, increasing the developer strength increases the risk of damaging your scalp and hair.
You can, however, dilute the developer to your liking with water to obtain the volume you want.
Features
Although the formula is cruelty-free regarding the environment, it’s not cruelty-free regarding your hair. As there are no caring ingredients included like in the Schwarzkopf BlondMe and Wella bleach powders, most likely your hair will feel dry and damaged. Particularly in combination with the high volume developer, it has the potential to fry your locks and leave them damaged.
What’s included in the kit
The kit includes everything you need to bleach your hair – brush, mixing bowl, cap, gloves, bleach powder, and developer. The bleach powder is the same stuff as in the 30-vol kit, but the supplied developer is stronger, at 40 volume.
Pros
- Vegan and cruelty-free
- Everything is included in the kit
- Great kit for resistant hair
Cons
- Can be too strong for some
- Lack of nourishing ingredients
8. Best Cream Hair Bleach Wella Blondor Soft Blonde Cream Lightener
Editor’s Rating:
Level of lift: Up to 7 levels
Amount you get: 7 oz.
From Wella’s Blondor range you get to choose whether you want to use the powder or this cream. This lightener is specifically designed for on-scalp applications, as it’s much more gentle than the Blondor powder.
Strength
While this cream formula offers you up to 7 levels of lift, it’s much more gentle on your scalp. The quality of ingredients is just as high as in the powder, however the formula was adjusted for skin contact, making it the best option for bleaching your roots.
Features
As the bleach is in a cream formula, it contains liquid care ingredients, such as nourishing oils, as well as hydrophobic (water-hating) ingredients. Anti-irritant and anti-bacterial compounds, bisabolol and farnesol, are included to care for the scalp during the bleaching process.
While it may sound that you can simply apply the cream bleach directly to your roots, this is not the case and you will need to mix this lightener with a developer.
What’s included in the kit
The pack contains a 7 oz. tube of oil-mixed cream lightener. It’s recommended to get a Koleston developer, however, you can use any brand developer as long as it’s a 20 volume or lower.
As the tube contains quite a small amount of the bleach, it is the perfect product for root touch-ups.
Pros
- Perfect for on-scalp applications
- Contains caring ingredients for a healthier experience
- Very gentle formula
Cons
- You get only a small amount
- Not suitable for off-scalp applications or doing a full head bleach
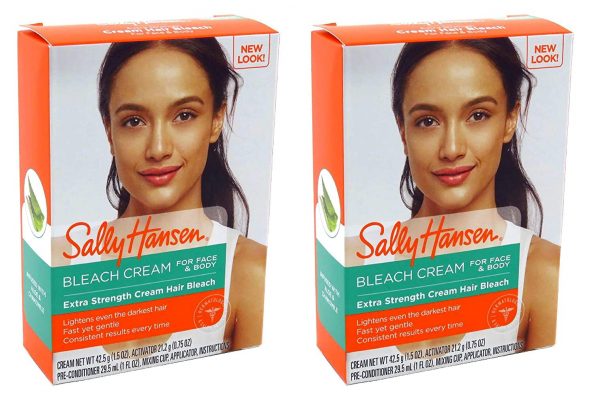
9. Best Body Hair Bleach Sally Hansen Creme Bleach Extra Strength Face & Body
Editor’s Rating:
Level of lift: Very low
Amount you get: 1.5 oz.
If it’s not your head hair that you want to bleach, there are products available for body hair such as this Sally Hansen cream bleach. As normal hair bleach is much too strong to use on your body, this bleach is formulated specifically to lighten any facial hair, eyebrows, arm hair, and leg.
Strength
Much more gentle than the standard hair bleach, this uses only hydrogen peroxide for the bleaching process. There are no persulfate compounds that are found in normal hair bleach, making this suitable for facial use. However, if your hair is very dark and naturally resistant, you will most likely need more than one bleaching session if you want to dramatically lighten the hair.
Features
The included preconditioner contains witch hazel and alcohol to shrink the pores in order to minimize the irritation to the skin. The bleach itself contains mineral oil, aloe extract, and tocopherol (vitamin E), which will ease the irritation and prevent excessive skin dryness after the treatment.
Just like with head hair, the bleaching process can reveal warm undertones, and you may end up with orange or yellow eyebrows. As the formula doesn’t contain any toning ingredients, you may need to tone or dye your eyebrows the correct color.
While suitable for use on the face and body, don’t try to bleach your eyelashes or pubic hair: it’s just not a good idea.
What’s included in the kit
The pack includes bleach cream, activator powder, pre-conditioner, a mixing cup, and applicator, which is everything you need to achieve great results. The cream does contain parabens as preservatives, which can be a major downside for those who are trying to eliminate those compounds from their beauty routines.
Pros
- Preconditioner included to minimize irritation
- Infused with aloe
- Gentle enough to use on body and face
Cons
- May take more than one session to bleach dark hair
- Contains parabens
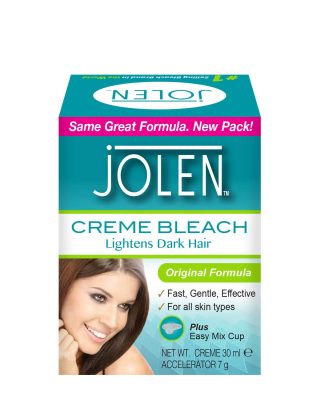
10. Best Cruelty-Free Hair Bleach Jolen Creme Bleach
Editor’s Rating:
Level of lift: Very low
Amount you get: 1 oz.
While Jolen Bleach is a popular choice and is not tested on animals, there is nothing about this bleach to write home about. It does bleach body hair well, but the formula is very basic, particularly when compared to the Sally Hansen bleach.
Strength
As the bleach is formulated for body use it’s more gentle, yet still effective. If you have very dark hair, you may need more than one bleaching session to get it to a desired level of blonde.
Features
It’s a very basic formula, containing only the necessary ingredients for the bleaching. It doesn’t contain any care ingredients like the Sally Hansen bleach does, meaning it may be a little drying and potentially irritating. The natural smell of bleach isn’t masked either, which can be off-putting for some.
What’s included in the kit
In the pack you will receive cream bleach, accelerator, mixing cup, and a spatula. Upon mixing the bleach and accelerator, you will obtain a thick cream that is ready to apply.
Pros
- Not tested on animals
- Thick non-drip formula
Cons
- Very bare-bones ingredients
- Can be irritating
- Has a strong smell
The Ultimate Guide to the Best Hair Bleach
Here is an in detail step by step guide to bleaching your hair, and doing it safely, so get ready for some science!
What Is Hair Bleach? How Does It Work?
Bleaching your hair consists of mixing a bleach powder and a developer to form an alkaline cream that will transform your hair into a blonde paradise. It’s been practiced for over two thousand years and a whole mix of things goes into the formulation, so here’s an overview of the chemistry.
The Bleach
The bleach powder you get is made up of persulfate compounds, pH balancing ingredients, and care ingredients. Persulfates are responsible for the strength of the bleach, and alongside hydrogen peroxide found in the developer, they oxidize and destroy the pigments in your hair. The pH balancing ingredients maintain an alkaline environment, which causes the hair cuticle to swell and lift, exposing the pigments found in the hair.
Powder vs Cream
Creams like the Wella Blondor tend to be much more gentle than powders as the concentration of persulfates isn’t as high. They will do less damage to your hair but because of the lower strength, they won’t lift as much color. Cream bleach is also supplied in smaller quantities, making them the perfect choice to treat your grown-out roots. You do still need a developer however, to make the bleaching maximally efficient.
Developer
A developer contains hydrogen peroxide as well as emollient ingredients to dissolve the bleach powder and provide a workable consistency. The hydrogen peroxide concentration is what determines the strength of the developer, which is given as 10 (2%), 20 (6%), 30 (9%), and 40 (12%) volume. The higher the volume, the more hydrogen peroxide is in the solution, resulting in more efficient pigment oxidation.
Higher volume developers also have a longer development time. This means that while a lower volume developer will fizz out and stop developing after 10-20 minutes, leaving the persulfates to finish the job, the higher volume developer, such as 40 vol, will keep on developing for a whole 50 minutes. This results in a very aggressive bleaching process for the whole duration of the bleach sitting on your hair.
It’s therefore important to choose an appropriate strength developer for your hair, to bleach the pigments in your hair without damaging your scalp or the hair structure.
Care ingredients
Sometimes companies will put in ingredients that are supposed to protect the hair shaft, repair the damage, and ultimately leave your hair feeling healthy. Such ingredients are definitely something to consider if you’re planning to bleach your hair more than once as these ingredients will pay off in the long run, so consider something like the nourishing Schwarzkopf Professional Igora Vario Blond Plus.
Bleach or Color Remover – What’s The Difference?
Depending on the result you want to achieve, if you have colored your hair before, you have the option of using a color remover, bleach, or both.
Color Remover
As the name suggests, a color remover removes color from your hair. While it won’t do anything on natural virgin hair, it can be a great option for those who have previously dyed their hair.
If you want to go back to your natural hair color you don’t have to use bleach, as you can remove only the extra pigment. The remover is much more gentle than bleach, and if you’re not trying to go lighter than your natural hair color then there is no need to undergo such harsh treatment.
Also if you have dyed black hair, and you do want to bleach it, this is most likely the way to go – remove all the hair dye first with a color remover, then do a strand test, and go with bleach afterward. You will need fewer bleach sessions using this method, and it will keep your hair a little bit healthier.
Bleach
Bleach doesn’t remove pigment in the same way a color remover does. While a remover brings back your natural hair color by reducing the synthetic pigment molecules, bleach destroys all the pigment by oxidation.
This means not only the additional pigment from the dye gets removed, but also melanins, which are the molecules that create natural hair color. As some pigments are more difficult to oxidize than others, you may find that your hair has a warm undertone after bleaching. For more info on this check out the chemistry corner.
What Do We Mean by Lift?
This can be a little confusing as it refers to both the action of lifting the cuticle to create access to the pigments as well as the lifting of color out of the hair, hence removing it. The action of lifting the cuticle from the hair shaft, creating access to where the pigments reside, looks a bit like when an acorn opens up to release the seeds. You want enough lift to make the pigments accessible to the bleach but not so much that the cuticle will rip right off resulting in melted hair that just breaks off at the slightest touch.
The level of lift describes the number of levels your hair can lighten according to the hair color table. Generally speaking, the higher the lift level, the stronger the bleach is.
Assessing Your Hair
This will play a big role in the hair bleaching journey, as the products you choose will be determined by what your hair needs and what it can handle.
Determining Your Hair Type
Hair can be put on a scale of color (tone) and depth. How dark your hair is naturally depends on the levels of melanin in the hair shaft. As shown in our table type 1 hair is the darkest black and type 10 is platinum blonde.
Hair color consists of the main color as well as the undertone – similarly to your skin. The color itself is quite easy to get out, but then what you’re left with is the undertone. Red pigments are harder to oxidize and remove out of the hair shaft, causing the brassy tint after bleaching. Check out the chemistry corner if you’re interested in the science behind natural hair color.
Bleaching Virgin vs Previously Colored Hair
Bleaching dyed or processed hair is slightly different from bleaching virgin hair. Previous treatments and dyes make the hair more porous as the cuticle is inevitably damaged to some extent.
This means that your previously processed hair requires more delicate treatment, hence lower strength developer. Depending on the damage you’d want a 10 vol developer if your hair is highly processed and quite light already, and a maximum 30 vol developer if you feel your hair is super healthy despite the previous treatments.
If you have virgin hair the cuticle should be in really good shape, protecting your hair and effectively making it non-porous. This means you will need a stronger developer such as 30 or 40 volume, to swell and lift the cuticle enough to enable the bleach to penetrate.

Health of Your Hair
Already damaged cuticle will make the hair more porous, making the bleaching process more damaging. If your hair is already damaged and porous, you will need to be more gentle with the process than if you were bleaching super healthy hair.
You need to take into account that the cuticle doesn’t need to be lifted as much to expose the pigments. Picking a lower volume developer is one of the ways in which you can reduce the damage. Choosing products that are packed with care ingredients is a good option, as they will help to minimize the damage.
Strand Test
Whatever your bleaching plans are, do a strand test first. It will save you potential headaches later on, as you will know what to expect.
To do a strand test it may be easiest to cut off a small strand, around 2 inches, from the back on the underside of your hair so it won’t be noticeable. You can also do the test without cutting by separating a strand and tying it off.
- Treat the hair as you will treat your hair later, so you get a predictable result. After assessing the hair, decide on the bleach and the developer, mix up a small amount according to the recommended ratio, and apply this to your test strand.
- Observe the development time for that strand, how the hair develops in general, and what color it is after washing off the bleach. If you decide you need a higher or lower volume developer, you should perform the strand test again.
This way you will know exactly what to expect and what toner to pick to finish the job. This will also minimize the chances of excessive damage and the hair melting. Remember that the ends are the most damaged part of your hair – if your ends bleach well, the rest of your hair will be fine too.
The General Hair Bleaching Process – a Step by Step Guide
Step 1 – Do a Strand Test
Before you do anything, check how your hair will react to the bleaching process by performing a strand test as previously described.
Step 2 – Prepare the Tools and Space
Once you know what you need for your hair to bleach successfully, get the equipment ready so you don’t run around the house trying to find things as you bleach.
If you got a whole kit such as the Manic Panic Flash Kit, then all you need is an old t-shirt to wear, a towel for potential spills and drips, and a toner or hair dye.
If however, you got bleach powder such as Blondor, in addition to the list above you will need a developer, a mixing bowl and applicator brush, gloves, and a plastic bag or cap.
Step 3 – Brush and Section Your Hair
Before you start you should brush your hair to get out any tangles and knots. Don’t scrub at the scalp with the brush though as this will cause damage to the scalp, and once the bleach is applied it will burn.
Section the hair into at least four sections – two at the front and two at the back, by parting your hair down the middle and then from the apex of your head to behind your ear on each side. How many sections you need is up to you and how thick your hair is, as thicker hair will need more sections. You can check out different ways of sectioning your hair here.
The goal is to have manageable segments that you can handle easily to thoroughly apply the bleach to every single hair strand.
Step 4 – MIX and Apply the Bleach
First mix…
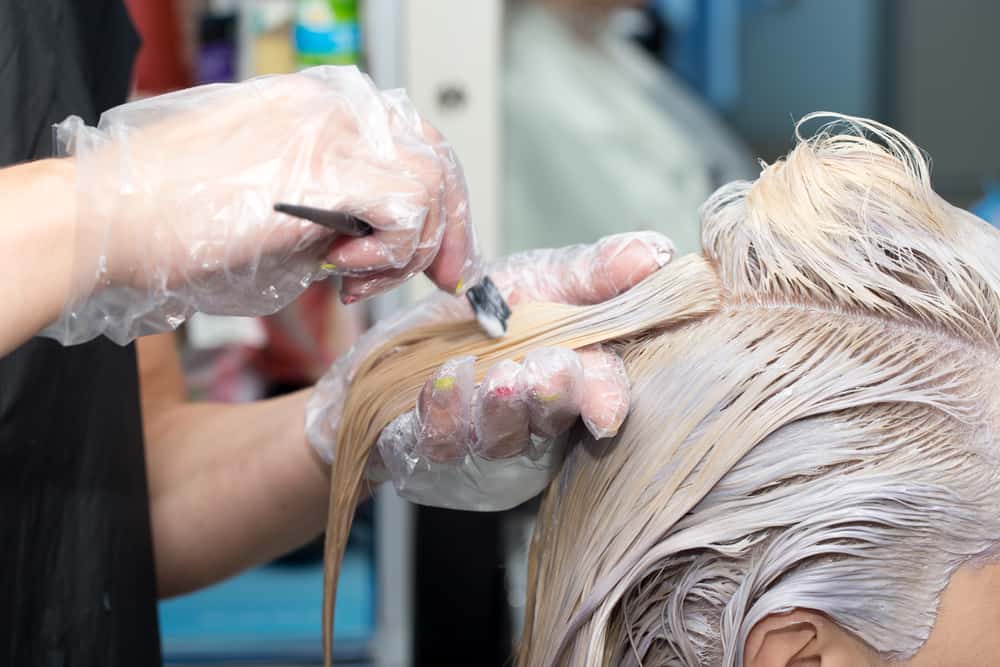
Read the instructions, get your gloves on, and get mixing! The ratio of powder to developer can be anywhere between 1:1 and 1:2, so make sure to check in the instructions provided, as this information will be included with the products.
If you get just a bleach powde,r you’re free to choose whatever brand of developer you want. For some of the premium products with caring ingredients, such as BlondMe, you will most likely get a superior result if you use the recommended developer for the bleach.
Make sure you mix the components thoroughly to obtain a smooth creamy consistency.
…then apply
The order of application of bleach is non-negotiable – first midsections and ends, then roots. The midsection starts between 1 ½ to 2 inches away from the scalp, and you want to work from this point down the strand all the way to the ends.
Using your hands and the applicator brush, work through your sections, one at a time, starting with the front and working towards the back to allow your front hair to process a little longer. Take thin strands of hair to make sure that you’re saturating every single hair – in the case of bleach more is more, so don’t skimp on the amount. If the hair isn’t fully saturated, the bleach can dry out, stopping the development process and ultimately providing you with uneven cheetah spots – not a good look.
Once all your hair is bleached from midsections down, start applying the bleach to your roots. This is important as the heat from your scalp will process the roots faster which can result in hot roots that are lighter and yellow compared to the rest of your hair. For this reason, it is never recommended to use anything more than a 20 volume developer for on-scalp application.
Step 5 – Let the Hair Process
To prevent the bleach from drying out, and to allow the hair to lighten efficiently, put a plastic cap or bag on your head. This will keep a humid warm environment, which is perfect for the bleaching process.
Every 10 minutes, check on your hair to make sure it’s developing as expected (remember your strand test?) and stop if your hair starts to steam, fizz or do anything you clearly don’t want it to do. Some itchiness is to be expected, though, if you applied the bleach to your scalp – try not to scratch, as this will cause your scalp to not only itch but also burn. If your hair is developing fine and isn’t breaking, continue the process until it’s time to wash the bleach off.
The development time is usually between 30 and 50 minutes, so keep on checking up on your hair to make sure you get it to the level you want while preventing potential damage.
Step 6 – Wash and Tone/Dye
Once your hair is ready, wash the bleach out thoroughly. Do not be rough with your hair as it’s still in a very fragile state!
Assess your hair and tone it to neutralize the warm tones, or dye it the desired color.
Tips, Tricks, and Warnings
Here is a compilation of the most common mistakes, and suggestions on how to avoid them. This type of information is normally only obtained from experience, but by reading this section you will be prepared much better than most people when starting your hair bleaching journey.
Getting the Perfect Results
The trick to getting the perfect blonde hair of your dreams is knowing that there is no single trick. However, a great result can still be achieved by being thorough and careful throughout the process.
The more experience and knowledge you have with hair bleaching, the more likely you are to make good decisions and adapt during the process, resulting in a better outcome.
Avoiding Irritation
Not considering the scalp to be part of the hair bleaching equation can be quite dangerous. Not only can some ingredients cause an allergic reaction, but also there is a chance to permanently damage your scalp if you go too strong too fast.
To avoid any issues always follow the instructions and don’t use anything stronger than 20 volume on your scalp. Higher concentrations of peroxide have a chance of scarring the scalp causing hair loss.
Don’t panic though! Stick to lower volumes of peroxide, and be gentle with your scalp as scrubbing at it at any point will only cause pain and irritation. Be gentle to yourself and you’ll be fine.
Pro Tip: Some people do find that itching and slight burning can be eased if they apply coconut oil to their scalp before bleaching. The oil doesn’t affect the effectiveness of the bleach but can provide an extra layer of protection on your skin, hence minimizing damage.
Minimizing Damage to the Hair
Using bleach and a developer that is too strong for your hair has a chance of literally melting your hair off. As mentioned before, do a strand test to ensure that your hair will be fine with the chosen bleach and developer, and you can continue with the peace of mind that your hair will turn out gorgeous.
Do remember – during the bleaching process hair is in a very vulnerable state as the cuticle is wide open, exposing the cortex of the hair. This means that you want to be very careful with your hair during that time – you don’t want to cause any more damage than necessary:
- Do not brush the hair during the development process
- Don’t try to lather the bleach! Bleach is not shampoo and so it does not lather! Let’s repeat – bleach does not lather
- Don’t pull, twist, or rub the hair
Black Hair Dye and Metals
You will hear time and time again – don’t bleach hair that has been previously dyed black. But what’s the deal with that?
Black box hair dye can sometimes contain metal compounds as one of the ingredients, which will hang around in your hair, giving you a shiny raven black color. When metals come in contact with bleach they can corrode and stain, hence the warnings on the box saying to not use metal tools during the bleaching process.
Putting the two together, metal compounds in your hair can react with bleach just the same, causing a series of chemical reactions that will turn your hair into sticky gum.
So how to avoid this mess? Either you can hedge your bets and go straight into a strand test to see if the black dye will react. Or you can be super safe and use a hair color remover first, remove all the dye and bring back your natural hair color, and then follow with a strand test as you would normally.
Heat and Processing Time
One trick to make the bleaching process more efficient is to use heat to your advantage. While it’s not recommended to use any appliances to heat your processing hair, the heat from your scalp is sufficient.
Incubating your hair during the process by using foils or a plastic cap/bag is a good way of making bleaching more efficient. This way you can either shorten the overall processing time or use a lower volume developer, which will provide you with a healthier result.
Bleach Baths
If you really want to lather bleach, then doing a bleach bath is the only way. Bleach baths are a great option if you want to refresh your blonde hair and slightly lighten it by taking out the yellow tones.
This is done by mixing your bleach powder with shampoo and water and using this mixture to wash your hair. A bleach bath will cause minimal damage and is one of the best ways to gently lighten and maintain your blonde locks.
Refreshing Your Highlights and Roots
If the aim of the game is to maintain and refresh, the approach to bleaching is slightly different. The same rules apply, however you have to be very deliberate to where you apply the bleach.
When treating the roots, make sure you don’t overlap with the already bleached portion of the hair as this can lead to overprocessing, damage, and a weird outcome. Only apply the bleach to the grown out portion, and remember that roots process faster, so keep an eye on them.
Bleaching Body Hair
Bleaching hair other than on your scalp is a whole different ball game. The skin on your face, arms, and legs is more delicate and the hair thinner. It’s important to bleach on healthy unbroken skin, and when the pores are completely shrunk tight.
Shrinking the pores will minimize irritation and sensitivity, and for this reason don’t bleach after a bath or shower when the pores are expanded.
Pro Tip: Wiping the skin with some witch hazel or alcohol can help to shrink the pores and make the bleaching a lot less irritating.
Post-Bleach Care
You could write a whole book about toners and the color theory, but here are the basics to get you going.
Toner
After you wash out the bleach you will need to tone your hair. This is where the strand test comes in handy again, as you will know what your hair will look like after bleaching.
The toner you pick will need to be a shade darker to be effective, as the job of the toner is to deposit pigment back into the hair, effectively neutralizing the undesirable tones. If your hair is at a level 9 or higher you can use the Wella ColorCharm T18, otherwise, you should pick the toner that will work best with your hair undertone..
As a very quick guide:
| Color to neutralize | Shade needed |
| Red | Green |
| Red/orange | Blue/green |
| Orange | Blue |
| Yellow/orange | Blue/violet |
| Yellow | Violet |
| Pale yellow | Violet |
Haircare
If you do have the platinum blonde of your dreams, one way to maintain it and keep the yellow tint at bay is to use purple shampoo. While it won’t do much for darker hair, for the palest blondes it will keep the color fresh and beautiful.
Another way to treat your hair and avoid damage is to use specialized products such as Olaplex. While expensive, it’s definitely worth the splurge.
Now with the hair bleached and toned, you will need to assess the hair again if you want to go lighter still and repeat the process.
Chemistry Corner
The tone and depth of your hair are determined by melanin found within your hair. As your hair grows, a reaction takes place in the bulb of the hair where two types of melanin – eumelanin and pheomelanin are synthesized.
Eumelanin is what gives the main color of the hair, we perceive it as blacks, browns, and blondes. The more melanin the darker the color, and the fewer melanin compounds are found in the hair shaft the lighter (more blonde) the color. As you see this explains why you don’t require as much work to bleach naturally blonde hair vs black hair – it’s a simple numbers game of melanins vs persulfates.
Hair Color
Pheomelanin is what gives the undertone to hair. There is an international level system which is used to measure color depth and tone:
| Level | Color | Primary undertone |
| 1 | black | red |
| 2 | darkest brown | red |
| 3 | dark brown | red |
| 4 | medium brown | red, red/orange |
| 5 | light brown | red/orange, orange/red |
| 6 | dark blonde | orange/red |
| 7 | medium blonde | orange/yellow |
| 8 | light blonde | orange/yellow |
| 9 | very light blonde | yellow |
| 10 | lightest blonde | yellow |
Again, this shows you why your hair may end up orange after bleaching. That’s why doing a strand test is so important, so you know what to expect and how to proceed with the result. The pheomelanin is more difficult to take out of your hair, potentially leading to more bleaching sessions.
In the end, the toner takes care of neutralizing or enhancing the undertones of your hair, giving you the results you want.
The Chemistry of Hair Bleach
Bleach itself consists of the bleach powder and a developer, which you need to mix together to activate the compounds and get those chemical reactions going.
A bleach mixture is highly alkaline (pH of about 12) which causes the hair cuticle to swell and lift, revealing the hair cortex and the hair pigments normally protected by the cuticle. The persulfate compounds contained in the bleach powder and the hydrogen peroxide in the developer form radicals which aggressively attack pigment molecules oxidizing them. The oxidized compounds no longer hang around the cortex but are dissolved into the bleach cream, which you wash off afterward.
Unfortunately, as the persulfates and peroxide attack the molecules they can also react with the composition of your hair breaking the cysteine bridges that make your hair strong and elastic, which prevents spontaneous breakage. This is why if you go too strong too fast your hair is said to melt off – if the bleach destroys enough bonds in your hair, the entire structure will fall apart and fall off.
Wrapping Up
Now that you’re equipped with the knowledge you need, you can go forth and begin your journey towards the gorgeous blonde hair of your dreams. Using this guide you can pick the products that will suit you best, avoid common mistakes, and keep your hair healthy and beautiful.
