Looking good typically means feeling good, so it isn’t all too surprising that we, as a society, have always been in the pursuit of beauty and perfection. Throughout history, we see this pursuit lead to the creation and enhancement of the makeup products that we know and love today. Alongside these products, trends were created to boost the makeup’s effectiveness.
Depending on how successful they are, these trends die down eventually. Still, it was only a matter of time before someone in the present revived old trends again. Such is the case for baking makeup.
Baking Makeup: What It Means
Unfortunately, there are no mouth-watering desserts involved in baking makeup, but we do use a product very similar to flour—translucent powder.
With this powerful tool and a few minutes of our time, we can arrive at a makeup look that is bright, flawless, long-lasting, and oil-free—truly what every person wishes to see at the end of a beauty routine.
How It All Started
Baking makeup is an age-old beauty technique whose roots may be traced back to Ancient Egypt and the Victorian Era. But if we were looking for the clearest and most recent history, we need to turn to the art of Drag.
Drag performers use the term “baking” to highlight the way they set their makeup bases. They pack translucent powder onto their faces (typically under the eye) and let it sit for a couple of minutes, allowing the heat of their bodies to “cook” or set the product.
Other drag artists use makeup baking to brighten up the center of their faces to intensify their contours, changing their appearance to look more different than how they actually look.
Why It’s Popular Now
Drag artists have been baking their makeup for the longest time. RuPaul’s Drag Race queens such as Valentina and Naomi Smalls have even shown how to bake makeup in their respective routines. However, baking wasn’t really that popular with most people until Kim Kardashian started using it.
Much like heavy contouring, baking makeup was made into a common beauty technique by Kim, with the help of her makeup artist Mario. It first started with an Instagram photo of Kim baking her under-eye, followed by an instructional video on how to bake makeup. Through these, Kim showed that not only drag performers can bake their makeup. Even simple makeup enthusiasts can do it as well, further elevating their looks.
However, it should be noted that Mario doesn’t recommend baking your makeup every day, unless you always want a dramatic, long-lasting matte finish or you’re a stage performer.
Other notable names that have made the trend to what it is today are congresswoman Alexandria Ocasio-Cortez and beauty mogul Huda Kattan, who also posted a video on her channel teaching viewers how to bake makeup.
Myths About Baking Makeup
Now, applying makeup seems easy in principle, but there are plenty of things that can go wrong since we’re dealing with so many factors, from our skin types to our makeup products to the environment we’ll be spending our time in.
When it comes to baking, the one misconception often brought up is that the translucent powder causes the foundation and concealer to oxidize, leaving the person with a base that’s a few shades darker than their own. Or worse, an orange-looking face. Yikes.
Another myth often brought up regarding baking is that it soaks into our skin, which has caused numerous makeup enthusiasts to worry about their skin health and turn them off from baking.
There’s no reason for us to fret, though, since none of these things actually happen. Cosmetic chemist Jen Novakovich has revealed that baking is essentially the process of creating an oven with translucent powder and our body heat.
Combining the two makes way for evaporation. Liquid products, like concealers and foundations, evaporate and later get rehydrated by any moisture that our bodies produce throughout the day. Baking, then, helps revive our makeup looks and basically helps solve the patchiness problem that most people have to deal with.
Things You Need to Bake Makeup
Much like traditional bakers, we can’t exactly move forward and learn how to bake makeup without the necessary tools. So, let’s make sure we have these set up before we get started on baking.
Eye Cream

Eye creams are a must. These products specially designed for the delicate skin around our eyes act as a primer for later products. If we don’t have eye creams on hand, regular moisturizers will do.
Base Products
For baking to happen, we would need something to bake in the first place, so we really can’t go without our liquid bases. Concealers (either liquid or creamy) and liquid foundations are a must, and beauty gurus even recommend full-coverage bases to ensure an airbrushed look at the end.
Powder
Of course, another product we can’t do without is powder, which can come in loose or pressed form. While we don’t need to splurge on the powders we use, we should at least avoid products that have Silica, titanium dioxide, or zinc oxide in them. Using these products may cause the dreadful flashback to appear after we have completed our makeup.
Another pro tip: translucent powder is best used when opting for a natural finish. Meanwhile, powders that are in a shade lighter than our skin tone help create a brighter look.
Makeup Sponge and Brush
The ongoing debate about makeup sponges versus brushes needs to be put on hold for now since both brush and sponge enthusiasts need both items for the baking process.
A teardrop-shaped blending sponge will do fine, but others have also started using pressed powder sponges. For the brushes, any size will do, but we need to make sure it’s very fluffy so we can effectively brush off all the powder right after.
Optional: Contouring Tools
Contouring is baking’s best friend. Those of us who want to add more pizzazz to the final makeup look should consider bringing in contouring tools, like contouring palettes, bronzers, blushes, and tapered brushes.
How to Bake Your Makeup the Right Way
We’ve learned its history, we know who made it popular, and we have the tools; now we’re ready to bake our makeup and bring our game to the next level.
Step One: Start by Moisturizing
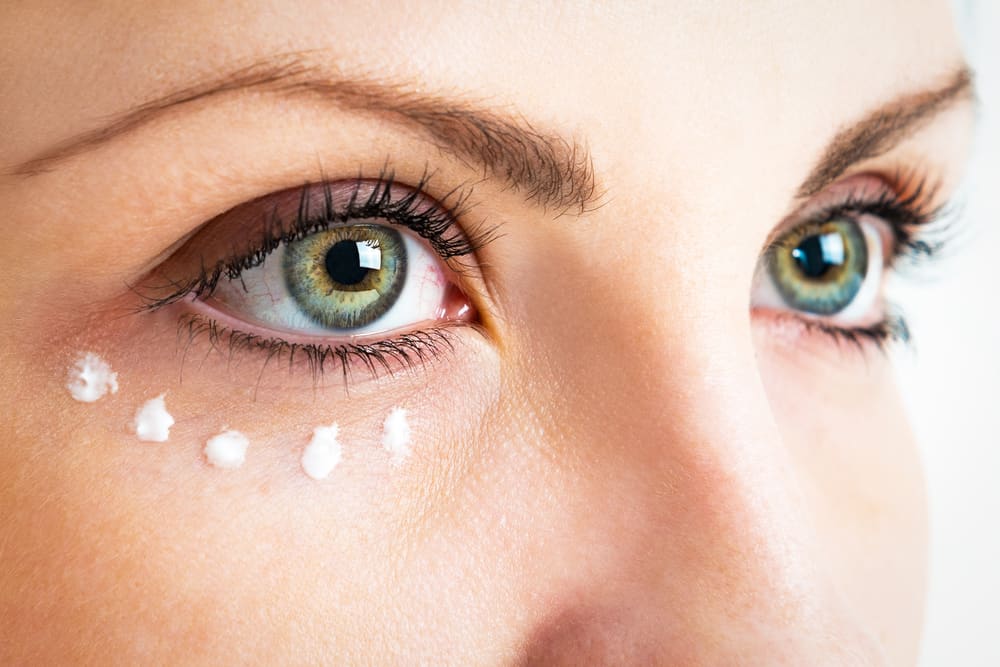
Baking or not, we should never forget to moisturize our skin. In this case, we begin the process with our handy eye cream or moisturizer. Using it to prime the area under our eyes not only hydrates our skin, but also smooths it out, allowing other products to apply nicely.
Step Two: Apply All Liquid and/or Cream Products
Once we’ve moisturized our skin, we’re ready to work on our bases. This is the step where we apply any and all liquid and cream products, in this case, foundation and concealer. Applying them on top of the baking area, later on, will only result in an awkward, cakey mess.
Step Three: Pack the Powder On
With our blending or compact powder sponges, we press onto our powder of choice, picking up as much of the product as possible. After, we gently dab it onto the areas we want to bake, like our under-eye. One go is often not enough, so let’s go back a second or third time to ensure there’s enough powder to bake everything properly.
A quick tip: Using a loose powder? It’s easier and cleaner if we transfer some of the powder product to the container lid before starting the baking process. It also prevents wasting an unnecessary amount of powder.
Step Four: Wait For a Few Minutes
Treating the powder like bread, we need to let it rest—but just for a few minutes—so it can do its magic. In the meantime, we can do the other steps in our makeup routine. Applying eyeshadow is a popular choice since the powder we’re using to bake protects our bases and makes it easy to remove any fallout.
We can also do our hair, choose our outfits, or even get started on actual baking—anything to pass the time, really.
Step Five: Brush off the Excess Powder
The recommended baking time for makeup is five to ten minutes, but we can go longer if we want to. Once we feel that our makeup has been baked long enough, we can then brush the powder off.
We can stop here and work on other parts of our faces. But those who want extra glow can apply brightening powder on top of the baked area to finish off the look.
Happy Baking
Baking makeup may seem daunting at first, especially if we have a makeup routine that already works for us. But let’s be real here, didn’t we all feel nervous trying out makeup for the first time?
It’s the same case for baking makeup. This time, though, we already know the tools and products. All we need is a little confidence to try something new.
