When we’re young, we tend to believe that only older people and those with very dry skin require facial moisturizers; however, as time goes by, we eventually recognize that everybody, regardless of their age or skin type, can benefit from using face care products. The key, of course, is to choose the right product for your specific kind of skin.
If your skin is typically dry, it makes sense to moisturize your face regularly; however, even if you have combination or naturally oily skin, using the correct face serum can help to bring a better balance to the skin and reduce excess oil production.
Bearing in mind that everyone should be keeping their skin well-hydrated, protected from irritation, and safe from environmental exposure, finding suitable moisturizing products is key. While there are plenty available for purchase, many of the best are very expensive. Fortunately, you can resolve this problem with our expert DIY face serum ideas.
- Choosing the Right Face Serum for Your Skin
- How to Use Essential Oils to Make DIY Face Serums
- How to Use a DIY Face Serum
- Which Carrier Oils Are Best for Each Skin Type?
- Which Essential Oils Are Best for Each Skin Type?
- Suggested DIY Face Serum Ideas for All Skin Types
- How Often Should You Apply a Face Serum?
- How to Buy Essential Oils for DIY Face Serums
- What Are the Benefits of DIY Face Serums?
- Create the Perfect DIY Face Serum for You
Choosing the Right Face Serum for Your Skin

When you wash your face, you’re often stripping away the skin’s sebum or natural oils. However, by using face serums made from essential oils blended with natural oils, you can replenish your face’s natural oils effectively.
Yet, all-too-often, face serums (both homemade and store-bought) are designed to be one-size-fits-all. Unfortunately, this isn’t the best approach. Everyone has different skin, and different skin types have different needs.
For example, if you have mature skin, you need to care for it properly. That means that you need a serum that hydrates, plumps up wrinkles and fine lines, increases skin elasticity, and evens pigmentation. On the other hand, if you have sensitive skin, you need a product that will soothe and hydrate your skin without causing or exacerbating irritation.
This is why you need to know your skin type before you can choose the correct serum to suit your specific needs. Once you identified your skin type, you can then find the right formulation for you and make up a face serum that helps you to maintain good balance and excellent moisturization.
How to Determine What Type of Skin You Have
Most people are already aware of their skin type; however, in some cases, it can be tricky to identify whether you have oily skin or dry skin. This is especially likely to be the case if you have acne-prone skin. Most acne sufferers believe they have oily skin, yet in many cases, acne presents itself in people who have dry skin.
One way of testing to determine your own skin type is by washing your face, then allowing it to dry naturally in the air. If your skin is dry or normal, it will begin to feel tight quite quickly. On the other hand, if your skin is naturally oily, you’ll find your skin feels refreshed and light after washing.
How to Use Essential Oils to Make DIY Face Serums
The good news is that it’s very easy to make your own DIY face serum. All you need is two ingredients along with three simple steps to follow. The basic procedure is as follows:

- Get a glass bottle and pour 2oz of carrier oil into it. The type of carrier oil you will need to suit your own skin type will vary, but you’ll find more information about this further down in this article.
- Add your chosen essential oil to the bottle – 20 drops is the ideal amount. Again, below, you’ll find the right essential oils to suit your individual skin type.
- Next, put the lid onto the bottle and roll it gently in the palms of your hands for 30 seconds. This will allow the carrier oil and essential oil to mix properly.
Once you’ve done this, you will have made a DIY face serum that is perfect for your skin type.
How to Use a DIY Face Serum
Once you’ve made your own face serum to suit your skin type, you’ll need to know how best to apply it to achieve the best possible effect.

- First, remove any makeup that you’re wearing.
- Cleanse your face using a face wash that suits your skin type.
- Apply a toner to your skin.
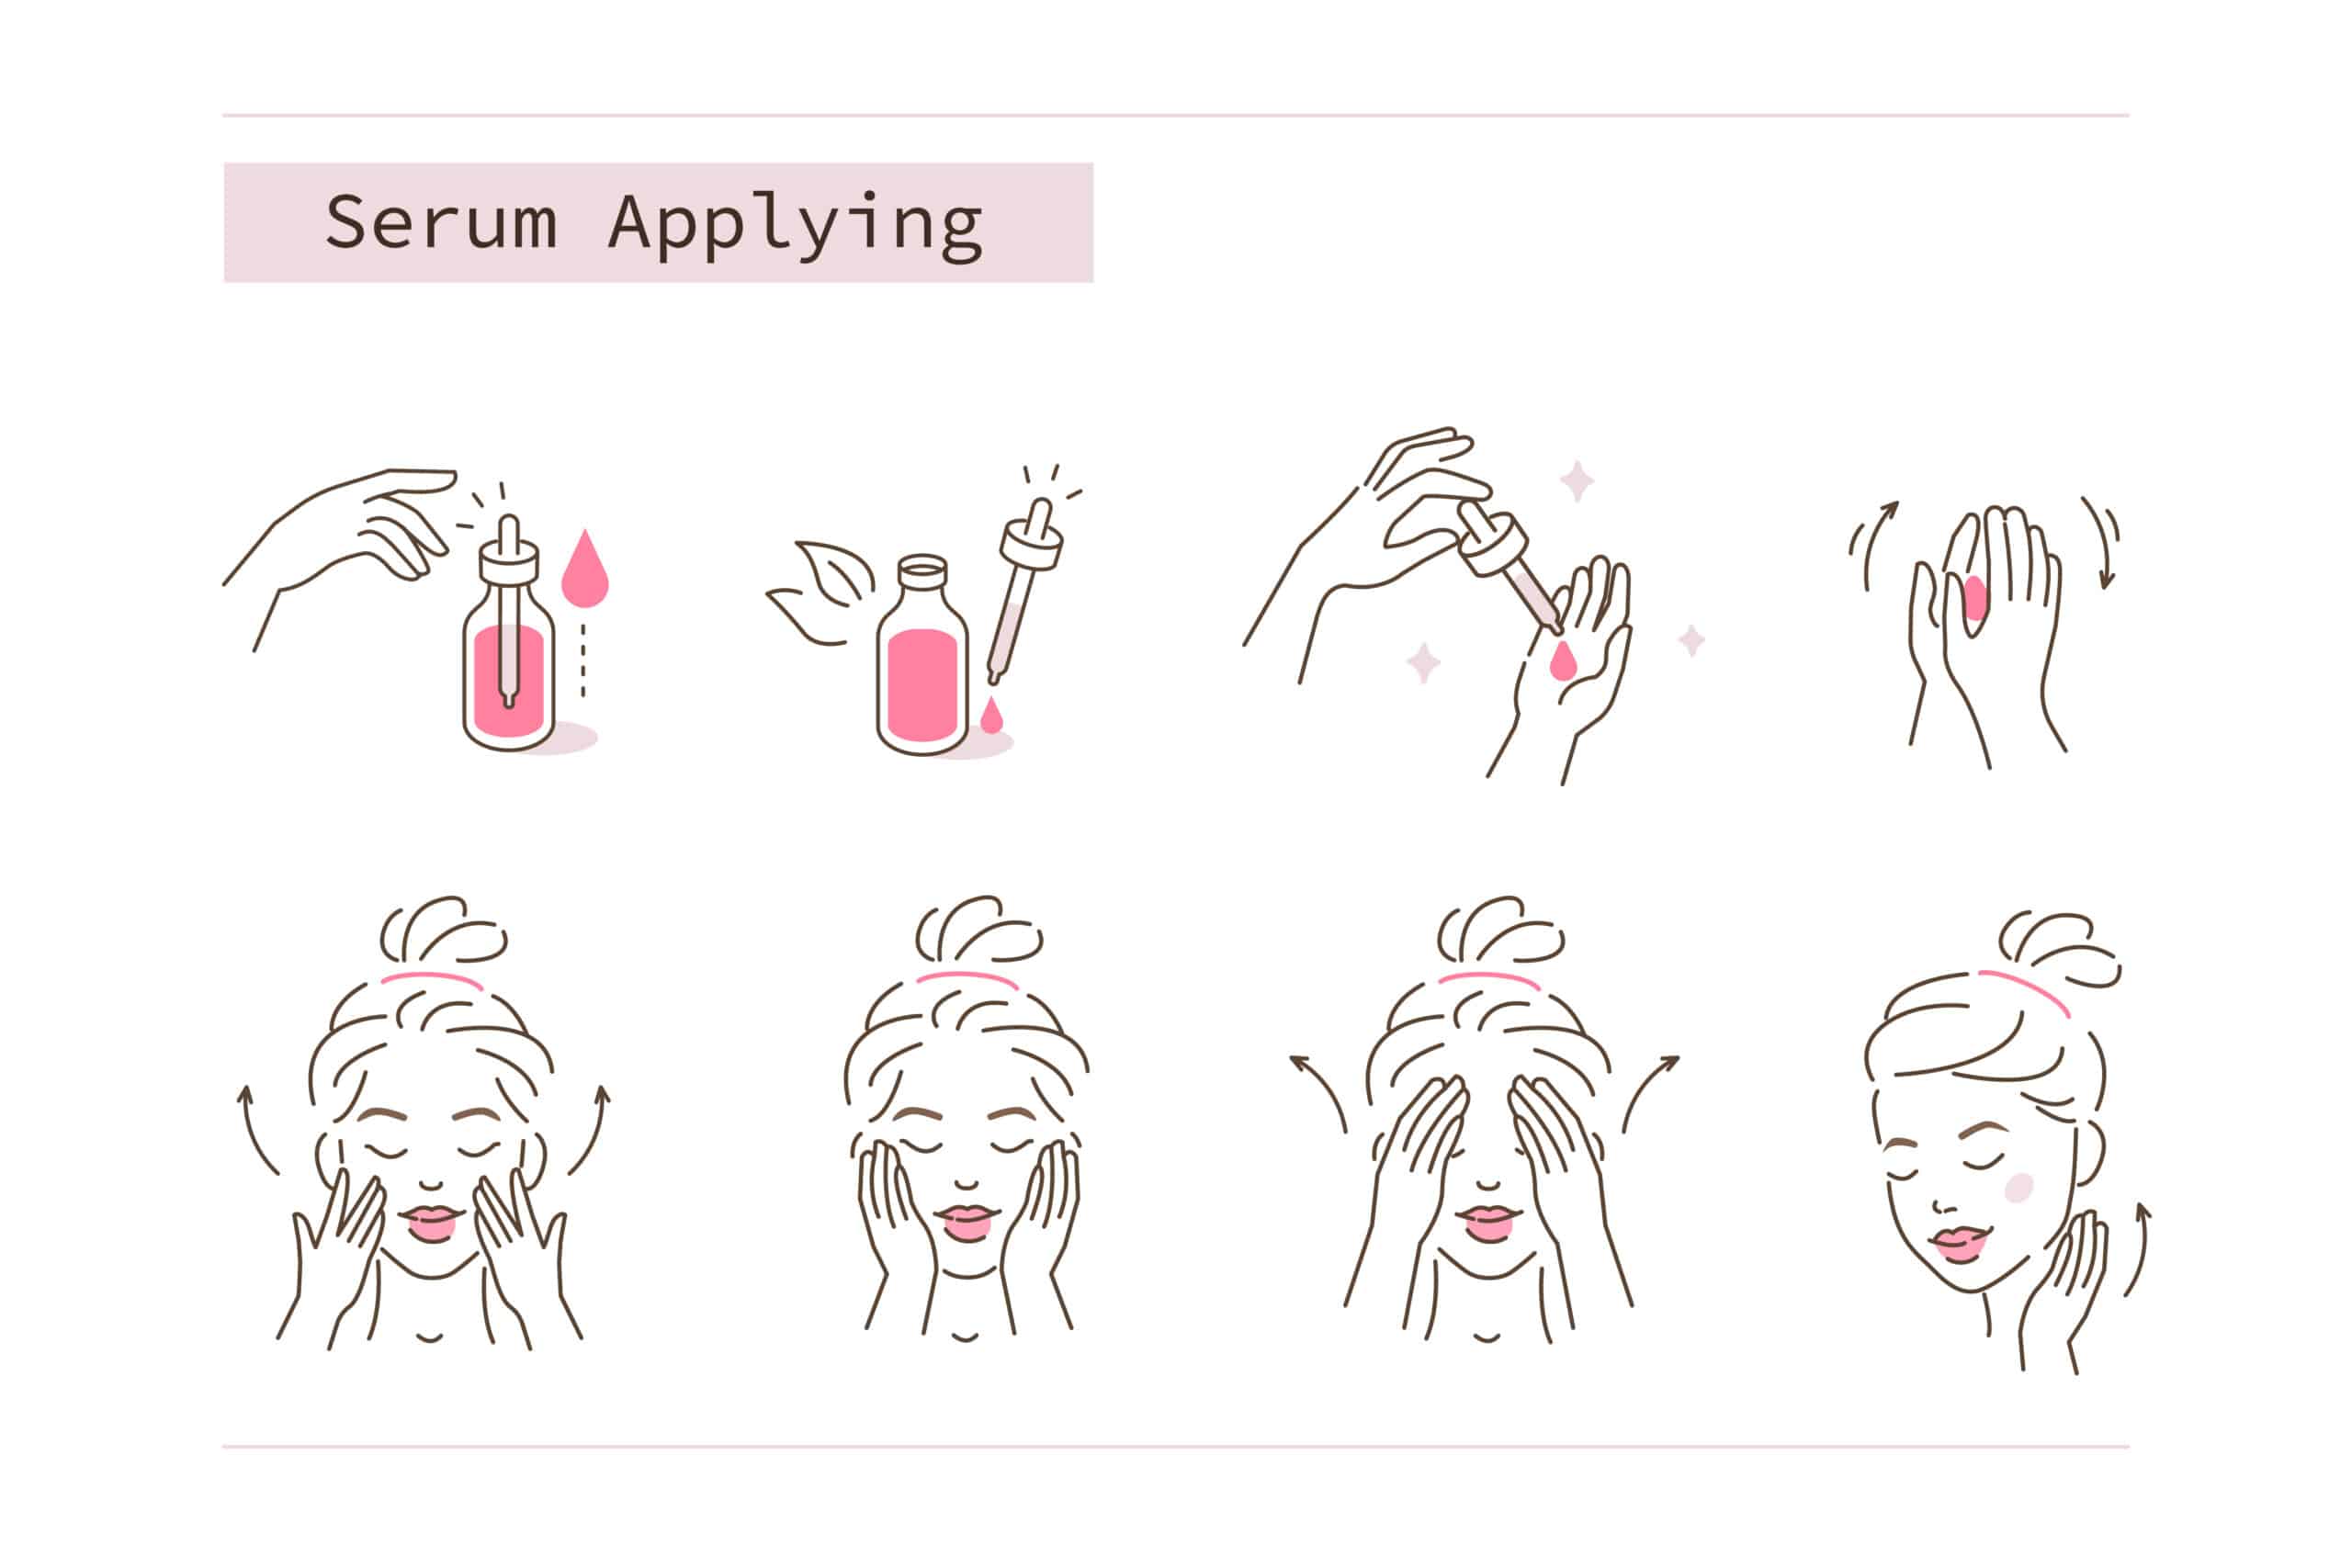
- Apply one drop of your serum to your chin, one to each cheek, and another to your forehead.
- Massage the serum gently into your skin using soft and small upward strokes.
- Close the lid of the bottle and store it in a dark, cool place.
Which Carrier Oils Are Best for Each Skin Type?
There are lots of different carrier oils to choose from, but not all are suitable for each skin type. Here, you’ll find a guide to the best options for each kind of skin so that you can find one that works well for you.
- Normal skin – jojoba oil, apricot kernel oil, sweet almond oil, sunflower oil, grapeseed oil.
- Dry skin – sweet almond oil, avocado oil, apricot kernel oil, rosehip seed oil, sunflower oil.
- Acne-prone skin – sesame oil, jojoba oil, grapeseed oil, argan oil, evening primrose oil.
- Sensitive skin – jojoba oil, sunflower oil, apricot kernel oil, sweet almond oil, avocado oil, rosehip seed oil, argan oil, evening primrose oil, grapeseed oil.
- Oily skin – grapeseed oil, argan oil, jojoba oil.
- Mature skin – rosehip seed oil, sweet almond oil, jojoba oil, sunflower oil, apricot kernel oil, tamanu oil, avocado oil.
Which Essential Oils Are Best for Each Skin Type?

Not only do you need to choose the correct carrier oil to suit your skin type, but you also need to select a suitable essential oil too. Here are some of the best essential oils to suit various skin types:
- Normal skin – geranium, frankincense, lavender
- Dry skin – lavender, geranium, patchouli, myrrh, frankincense, rose, cedarwood, ylang ylang, clary sage, sandalwood, Roman chamomile, jasmine
- Non-cystic acne-prone skin – cedarwood, geranium, lavender, tea tree, patchouli, rose, lemongrass, Roman chamomile, rosemary
- Sensitive skin – lavender, helichrysum, jasmine, rose, frankincense, geranium, sandalwood
- Oily skin – geranium, frankincense, patchouli, lavender, ylang ylang, tea tree, clary sage, cypress, Roman chamomile, sandalwood, rosemary, peppermint
- Mature skin – frankincense, rose, helichrysum, myrrh, geranium, sandalwood, patchouli, lavender, jasmine, cypress, ylang ylang, rosemary
Suggested DIY Face Serum Ideas for All Skin Types
Whether you have acne-prone, dry, mature, oily, sensitive or normal skin, here is a recipe to suit your needs.
Bear in mind that if you don’t have the specific type of essential oil or carrier oil recommended in the recipe, or dislike its smell, you can simply substitute it with another in the list above that falls under your skin type category.
Normal Skin DIY Face Serum Recipe
For normal skin, follow this recipe:
- Take a 2oz glass bottle then add to it 2oz of apricot kernel oil.
- To this, add 4 drops of frankincense oil, 8 drops of geranium oil and 8 drops of lavender oil.
- Replace the bottle’s lid and roll the bottle gently between the palms of your hands for 30 seconds so that the carrier oil and essential oils mix well.
Dry Skin DIY Face Serum Recipe
For dry skin, follow this recipe:
- Take a 2oz glass bottle then add to it 2oz of rosehip seed oil.
- To this, add 5 drops of rose oil, 5 drops of jasmine oil, and 5 drops of frankincense oil.
- Replace the bottle’s lid and roll the bottle gently between the palms of your hands for 30 seconds so that the carrier oil and essential oils mix well.
Acne-Prone Skin DIY Face Serum Recipe
For acne-prone skin, follow this recipe:
- Take a 2oz glass bottle then add to it 2oz of jojoba oil.
- To this, add 5 drops of tea tree oil, 5 drops of lemongrass oil and 10 drops of lavender oil.
- Replace the bottle’s lid and roll the bottle gently between the palms of your hands for 30 seconds so that the carrier oil and essential oils mix well.
Sensitive Skin DIY Face Serum Recipe
For sensitivel skin, follow this recipe:
- Take a 2oz glass bottle then add to it 1oz of jojoba oil.
- To this, add 5 drops of helichrysum oil, 5 drops of sandalwood oil, 5 drops of lavender oil, and 5 drops of frankincense oil.
- Replace the bottle’s lid and roll the bottle gently between the palms of your hands for 30 seconds so that the carrier oil and essential oils mix well.
Oily Skin DIY Face Serum Recipe
For oily skin, follow this recipe:
- Take a 2oz glass bottle then add to it 1oz of jojoba oil and 1oz of grapeseed oil.
- To this, add 10 drops of cypress oil, 5 drops of peppermint oil and 5 drops of rosemary oil.
- Replace the bottle’s lid and roll the bottle gently between the palms of your hands for 30 seconds so that the carrier oil and essential oils mix well.
Mature Skin DIY Face Serum Recipe
For mature skin, follow this recipe:
- Take a 2oz glass bottle then add to it 2oz of rosehip seed oil.
- To this, add 5 drops of rose oil, 5 drops of helichrysum oil, 5 drops of geranium oil, and 5 drops of frankincense oil.
- Replace the bottle’s lid and roll the bottle gently between the palms of your hands for 30 seconds so that the carrier oil and essential oils mix well.
Combination Skin DIY Face Serum Recipe
For combination skin, follow this recipe:
- Take a 2oz glass bottle then add to it 1oz of rosehip seed oil and 1oz of jojoba oil.
- To this, add 5 drops of lavender oil, 5 drops of geranium oil, 5 drops of Hawaiian sandalwood oil, and 5 drops of frankincense oil.
- Replace the bottle’s lid and roll the bottle gently between the palms of your hands for 30 seconds so that the carrier oil and essential oils mix well.
How Often Should You Apply a Face Serum?
Typically, you should apply your DIY face serum both in the morning and in the evening. First thing in the morning, you should use the face serum as a moisturizer before applying makeup. Before bed, applying your serum should be the last step in your skincare routine.
A maximum of 3 to 5 drops is sufficient at any one time. This means your DIY serum is going to last for a good long while. Remember that a little will go a long way.
If it’s difficult to spread the serum over your entire face when using such a small amount, try applying it to the skin when your face is a little damp. This helps to lock in extra moisture from the water while also making it much easier to spread the serum evenly.
How to Buy Essential Oils for DIY Face Serums
You cannot make a DIY face serum without using essential oils, since they are powerhouse ingredients that help to transform and heal the skin. Therefore, you should always look for the best quality essential oils you can find.
When choosing between the different brands of essential oils on the market today, you need to check to make sure that the one you’re buying is therapeutic grade. Many purchased online, or even those found in reputable stores, are contaminated with a range of fillers that won’t help your skin and which could actually cause potential damage.
Take the time to read the labels and descriptions carefully so you can be certain of selecting a high-quality product that will offer maximum benefit for your skin.
What Are the Benefits of DIY Face Serums?
When you make your own DIY face serum, you can save a lot of money over purchasing a ready-made product in a store. Even better, you know exactly which ingredients it contains, and this means you can tailor your serum to precisely suit the needs of your own skin.
Since face serums balance your skin and help to keep it moisturized, they’re an essential addition to your daily skincare regime, regardless of your age or skin type.
Create the Perfect DIY Face Serum for You
With the help of this guide, you’re now ready to make the ideal face serum for your skin type, skin-health goals, and specific needs. Have fun experimenting, and reap the benefits of a face serum made exclusively for you.
